Fan-Out Orders using Amazon SNS and SQS
On This Page
Lab
Creating an Amazon SNS Topic and Amazon SQS Queues
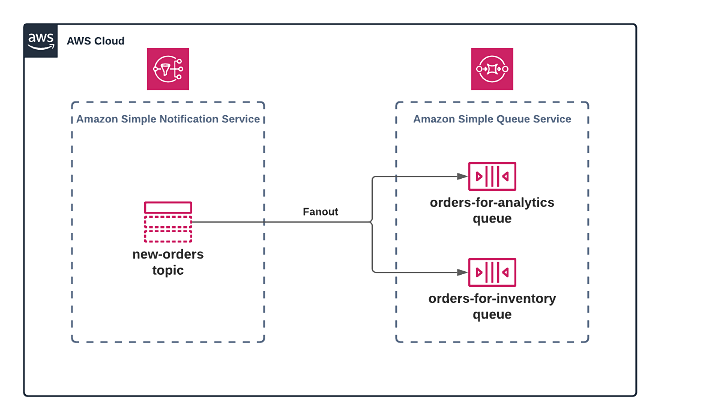
Here’s a diagram of what you will build and configure in this lab step:
- In the search bar at the top, enter SNS and under Services, click the Simple Notification Service result:

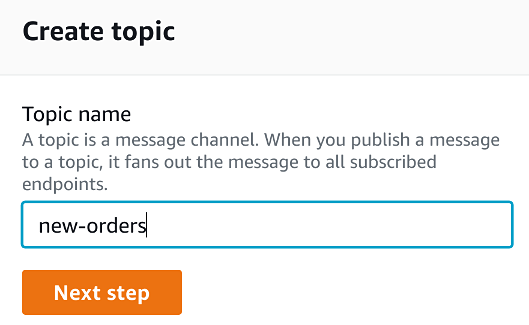
- In the Create topic card on the right, in the Topic name textbox, enter new-orders and click Next step:
The Create topic form will load.
By default, the Type of topic selected will be Standard. This is the most scalable topic type. The cost of this scalability is that message order and exactly-once delivery attempts can not be guaranteed.
If you are building a solution requires strict message ordering and exactly-once message delivery, you should use a FIFO type topic.
Standard is fine for this lab.
- Click the black triangle next to Access policy - optional to expand the section:

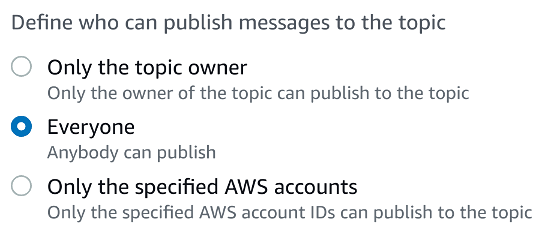
- In the Access policy section, under Define who can publish messages to the topic, select Everyone:
- Under Define who can subscribe to this topic, select Everyone:
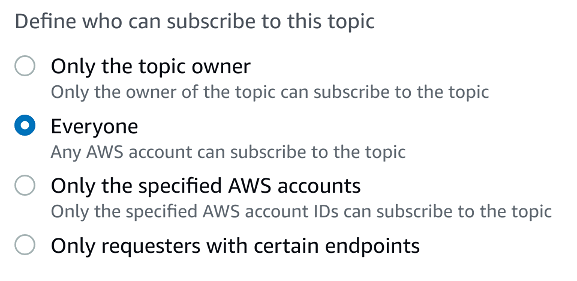
You are using a permissive access policy to save time and because the focus of this lab is on demonstrating the fan-out scenario.
In a non-lab environment, you should carefully consider the access policy required and make sure if conforms with your company or organization’s security requirements.
- Scroll to the bottom of the page, and click Create topic:

You will see a page load displaying details of your newly created topic:
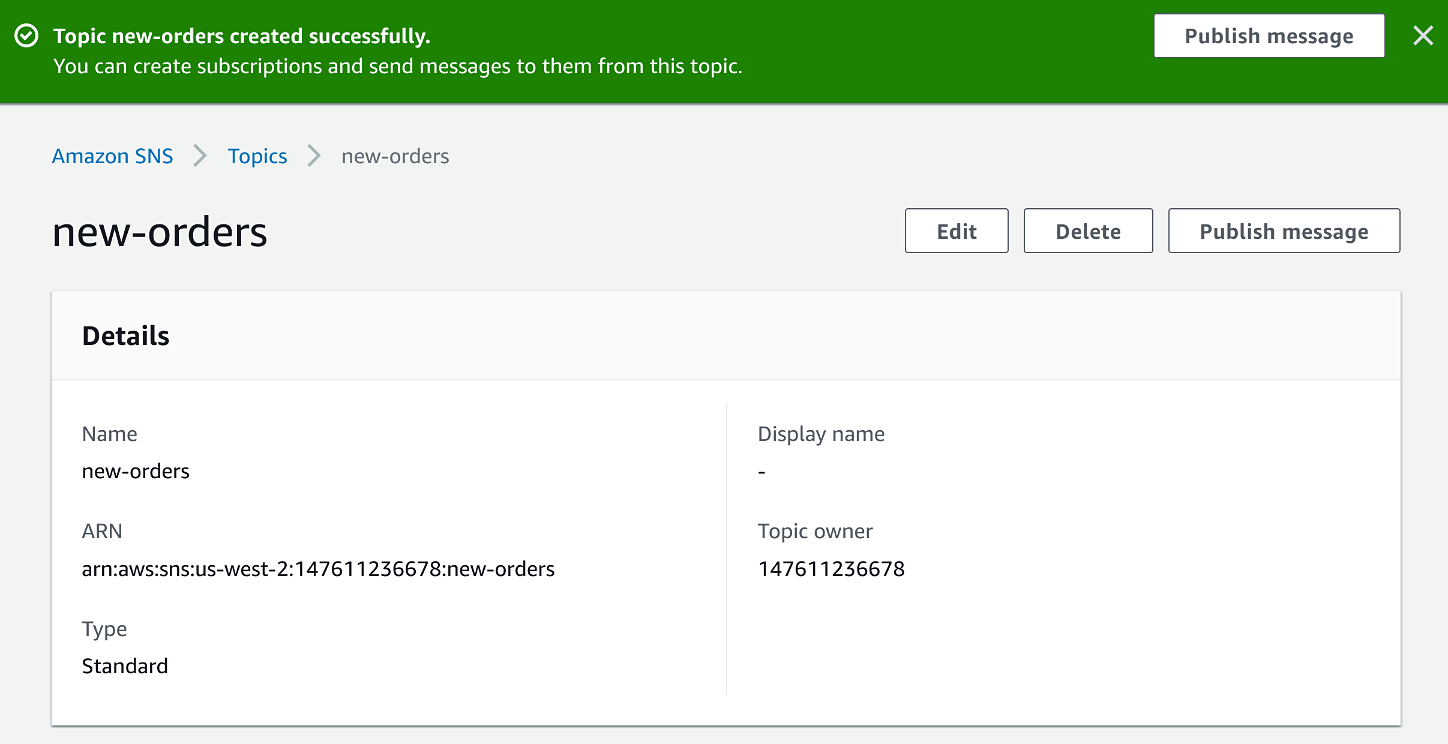
In the order processing system your are building, this Amazon SNS topic is where orders are published to. In a non-lab environment it would most likely be a web application or other application that accepts orders that will publish messages to this topic.
Next, you will create two queues using Amazon Simple Queue Service and subscribe them to your Amazon SNS topic.
- Open a new tab by right-clicking the AWS icon in the top-left and selecting Open in new tab.
Note: The above instruction may vary slightly depending upon the web browser you are using.
- In the search bar at the top, enter SQS, and under Services, click the Simple Queue Service result:

- In the middle right of the screen, in the Get started card, click Create queue:

The Create queue form will open.
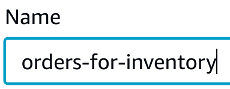
- In the Name textbox, enter orders-for-inventory:
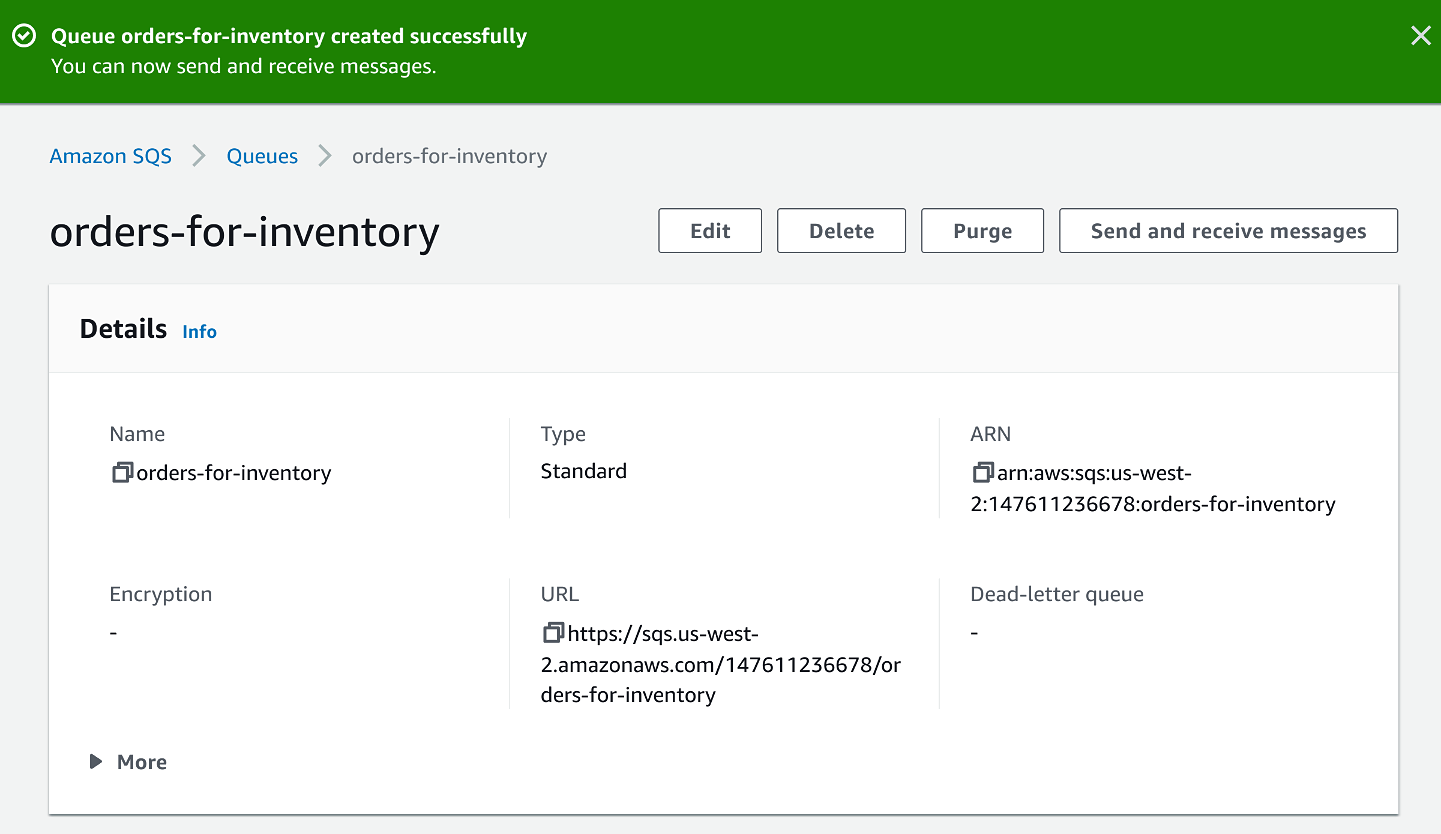
- Scroll down to the bottom, click Create queue:

You will see a web page load showing you details of your newly created Amazon SQS queue:
You will now create a second Amazon SQS queue for analytics.
- To navigate to the Queues list page, at the top-left, click Queues:

On the right-hand side, click Create queue.
Repeat the queue creation process, only this time enter orders-for-analytics as the Name of the queue.
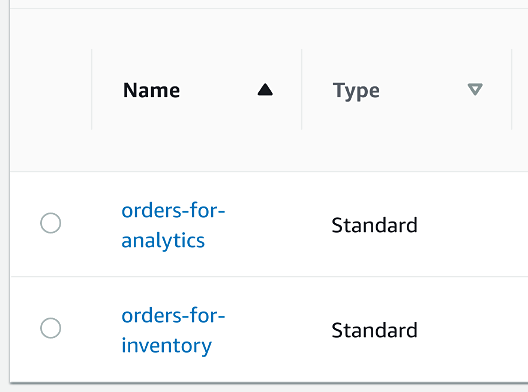
Return to the Queues list page by clicking Queues in the top-left.
You will see the two queues you have created:
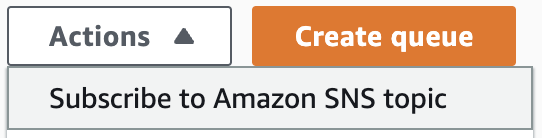
Click the radio button for the orders-for-analytics queue.
On the right-hand side, click Actions and click Subscribe to Amazon SNS topic:
The Subscribe to Amazon SNS topic form will load.
- In the Choose a topic drop down, select the topic ending with new-orders:
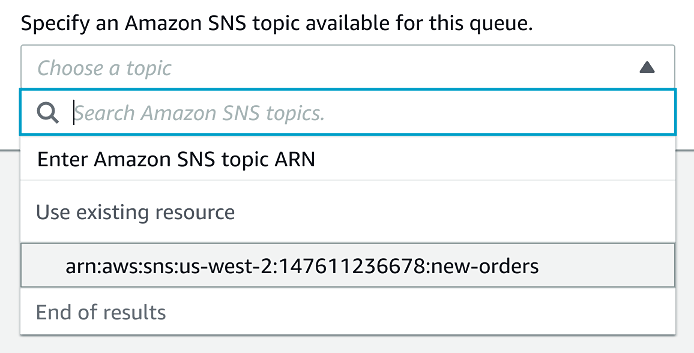
This is the Amazon SNS topic you created earlier.
Click Save to finish subscribing this queue to your topic.
At the top-left, click Queues again.
Repeat the topic subscription process for your orders-for-inventory Amazon SQS queue.
You now have both of your Amazon SQS queues subscribed to your Amazon SNS topic. Any messages published to the topic will fan-out to both queues.
Connecting to the Virtual Machine using EC2 Instance Connect
1. In the AWS Management Console search bar, enter EC2, and click the EC2 result under Services:

2. To see available instances, click Instances in the left-hand menu:

The instances list page will open, and you will see an instance named cloudacademylabs:

If you don’t see a running instance then the lab environment is still loading. Wait until the Instance state is Running.
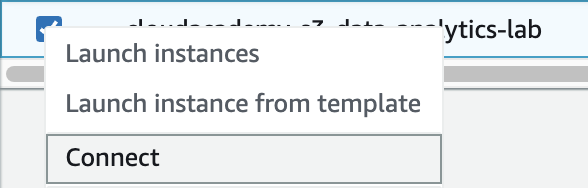
3. Right-click the cloudacademylabs instance, and click Connect:
The Connect to your instance form will load.
4. In the form, ensure the EC2 Instance Connect tab is selected:

You will see the instance’s Instance ID and Public IP address displayed.
5. In the User name textbox, enter ec2-user:

Note: Ensure there is no space after ec2-user or connect will fail.
6. To open a browser-based shell, click Connect:

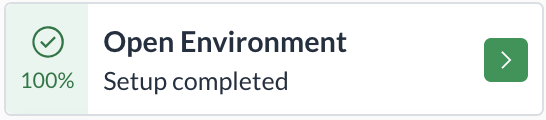
If you see an error it’s likely that the environment hasn’t finished setting up. Check for Setup completed at the top-left corner of the lab and try connecting again:
A browser-based shell will open in a new window ready for you to use.
Keep this window open, you will use it in later lab steps.
You can also connect to the instance using your preferred SSH client and the PPK (Windows) or PEM (Mac/Linux) key files in the Credentials section of this lab.
Publishing and Processing Messages
- In the terminal, enter the following command:
aws sns list-topics
You will see one topic displayed:
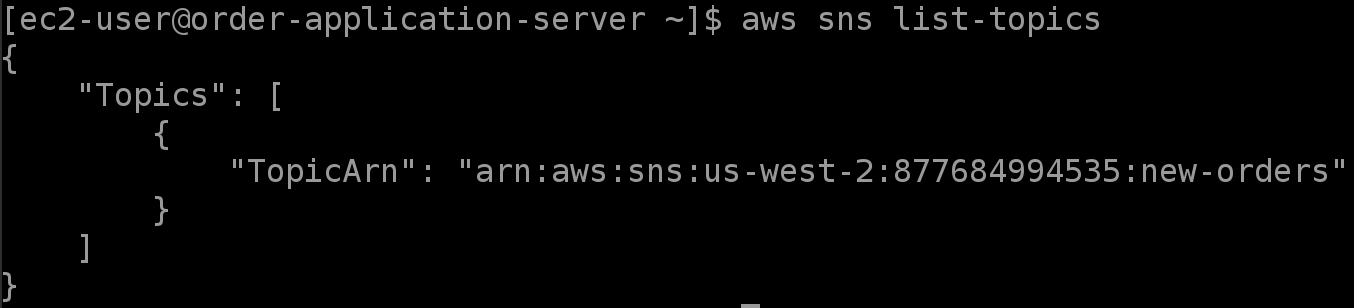
Note: Your TopicArn will have a different account identifier.
By default, the AWS command-line interface tool uses the JSON format for responses. This response contains an array of Topics with one element. The element consists of a TopicArn.
Arn is short for Amazon Resource Name. An ARN is used to uniquely identify resources in AWS.
In this lab, the EC2 instance has been configured with an IAM role that has permissions to interact with Amazon SNS topics and Amazon SQS queues.
- Store the value of the TopicArn attribute in a shell variable (
topic_arn):
topic_arn=$(aws sns list-topics --query 'Topics[0].TopicArn' --output text)
The above command uses the --query option to select only the value of the TopicArn and the --output option is used to specify plaintext format which removes the quotation marks from the value.
- To publish a message, enter the following, utilizing the ARN you stored in the
topic_arnshell variable:
aws sns publish \
--topic-arn $topic_arn \
--message  "1 x Widget @ 21.99 USD\n2 x Widget Cables @ 5.99 USD"
In response, you will see a MessageId:

Note: Your message identifier will be different.
You have successfully published an order message to your Amazon Simple Notification Service topic.
In this lab, you are using the AWS command-line interface tool to simulate an application publishing an order message.
In a non-lab environment, the message could be published by a web application that accepts orders from customers.
- To list Amazon Simple Queue Service queues, enter the following command:
aws sqs list-queues
You will see a JSON response:

The queues that you created earlier are listed.
- Store each of the QueueUrls in shell variables:
analytics_queue_url=$(aws sqs list-queues --query 'QueueUrls[0]' --output text)
inventory_queue_url=$(aws sqs list-queues --query 'QueueUrls[1]' --output text)
- To retrieve a message from the orders-for-analytics queue, enter the following command, utilizing the analytics queue URL you stored previously:
aws sqs receive-message \
    --queue-url $analytics_queue_url
You will see a JSON response containing an array with one Message:
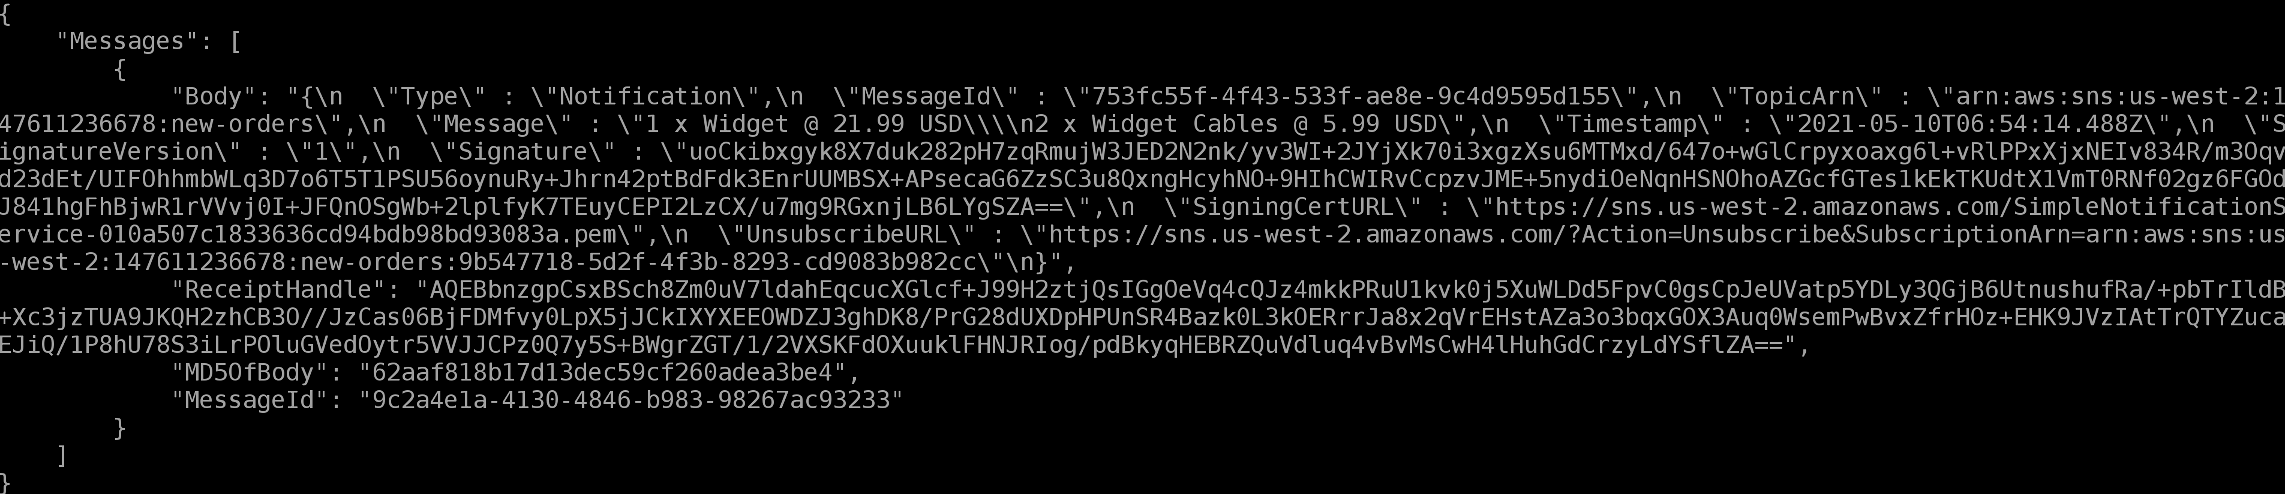
The response contains the following fields:
- Body: A JSON representation of the message
- ReceiptHandle: You are required to supply this to delete a message after processing
- MD5OfBody: An MD5 hash of the message body
- MessageId: The message identifier that Amazon SNS saw when pushing the message to the queues
- Note that this is not the same as the MessageId that Amazon SNS returned to you when you published to the topic
- Repeat the previous instruction, using the orders-for-inventory queue but store the message response in a shell variable (for use later) and output the shell variable (using Python’s JSON tool to pretty print it):
inventory_message=$(aws sqs receive-message --queue-url $inventory_queue_url)
echo $inventory_message | python -m json.tool
You will see the same message displayed again.
The message you published to the Amazon SNS topic has been sent to the Amazon SQS queues you subscribed the topic. This is an example of fanning out a message to multiple receivers.
In a non-lab environment, you could have worker applications constantly running and asking the Amazon SQS queues for more messages. One worker may be updating an inventory database for the order, whilst another worker could be recording the order details in a data lake for future analysis.
Using Amazon SNS and Amazon SQS like this allows you to build scalable systems that are decoupled and resilient. If a worker went offline, messages would queue up in the Amazon SQS queues. When the worker is available again, it can pick up new messages where it left off.
You can also have multiple worker applications, to help ensure there’s no downtime in message processing.
After successfully processing a message, a worker application should delete the message to prevent it from being processed again.
- Store the value of the ReceiptHandle attribute in a shell variable:
receipt_handle=$(echo $inventory_message | python -m json.tool | grep ReceiptHandle | cut -d\" -f 4)
- To delete a message, enter the following command for the orders-for-inventory queue:
aws sqs delete-message \
    --queue-url $inventory_queue_url \
    --receipt-handle $receipt_handle
- Return to your browser tab with the Amazon SQS management console open.
Note: If the SQS management console appears to only have one SQS queue, click the refresh button above the table:

The correct number of SQS queues will be displayed after a refresh.
Navigate to the Queues list and click the orders-for-inventory queue.
In the top-right, click Send and receive messages:

- Verify that in that Receive messages section, under Messages available, it says 0.
This is the queue you deleted a message for, simulating a long-running background application that receives an Amazon SQS message and then deletes the message after processing.
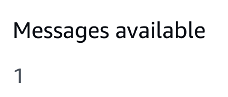
- Repeat the last three instructions for the orders-for-analytics queue and verify Messages available is 1:
This is the queue you did not delete the message for. The message is still available to be picked up for processing by an application receiving messages from the queue.