Introduction to DynamoDB
On This Page
Creating a DynamoDB Table with a Partition Key
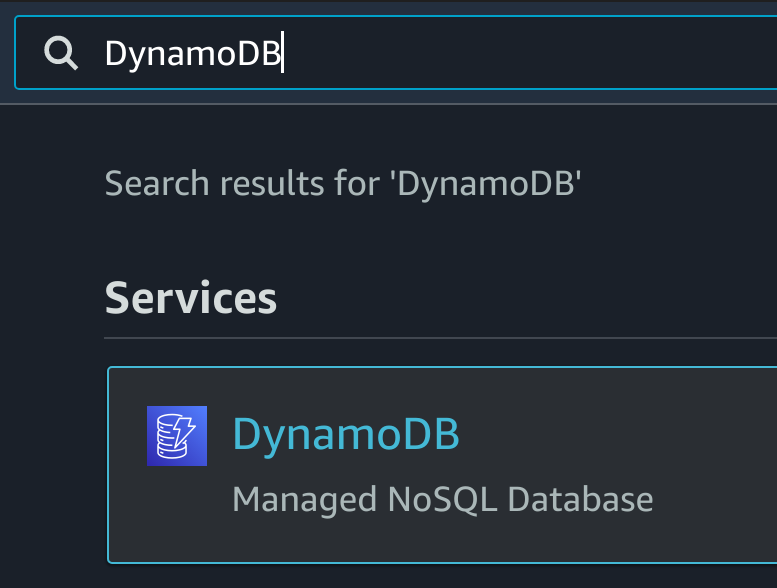
1. From the AWS Management Console, in the search bar at the top, enter DynamoDB, and under Services, click the DynamoDB result:
The Amazon DynamoDB product overview page will load.
2. To start creating a new DyanmoDB table, on the right-hand side, click Create table:

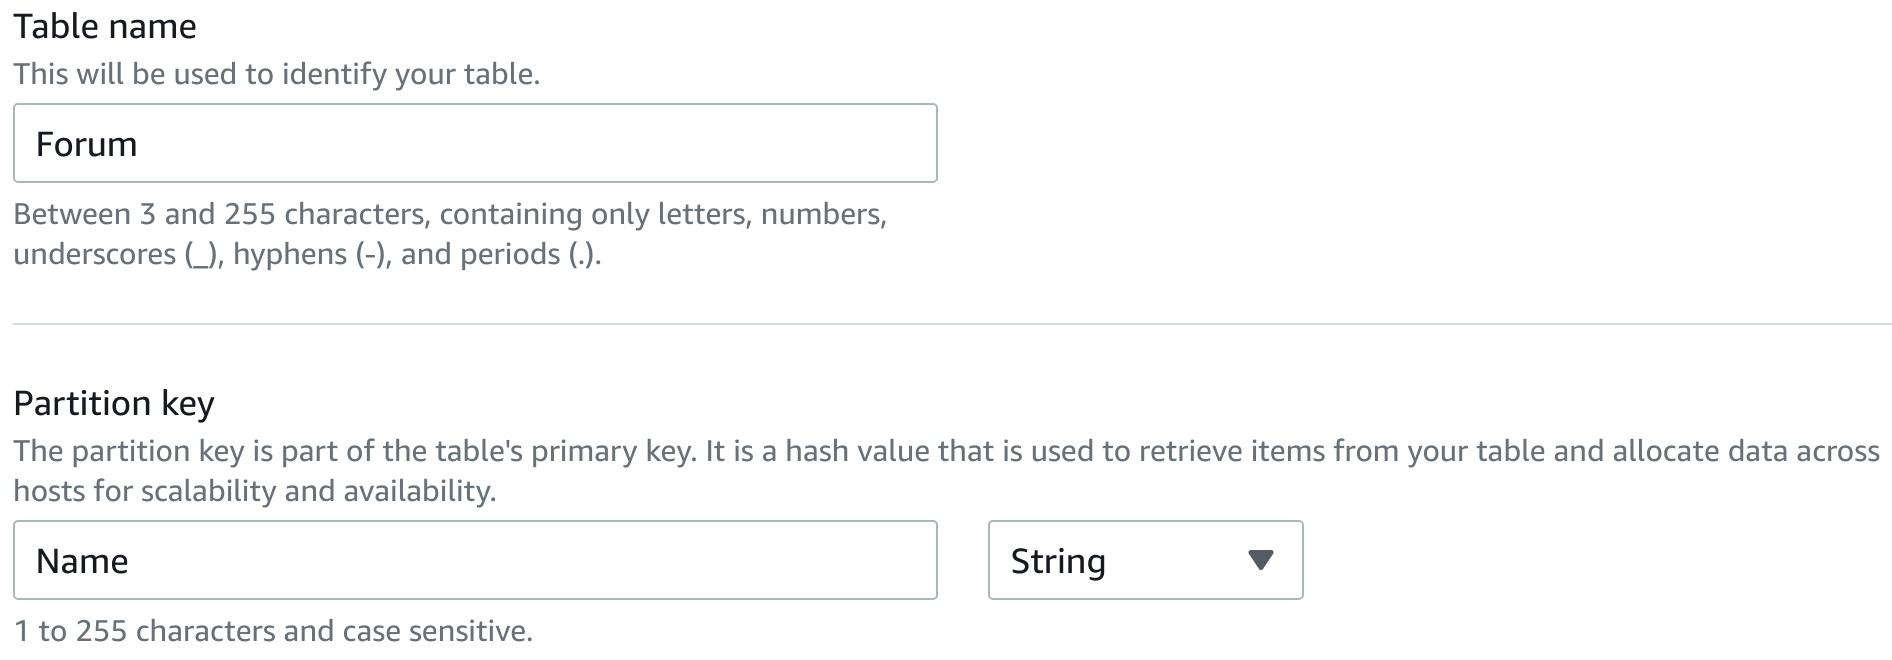
3. In the Table details section, enter the following:
- Table Name:
- Partition Key: Enter Name and ensure type is
4. In the Settings section, select Customize settings:
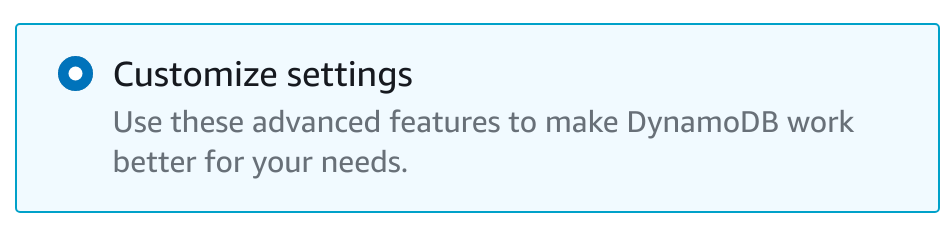
Choosing this option allows you to specify values for the table’s read and write capacities.
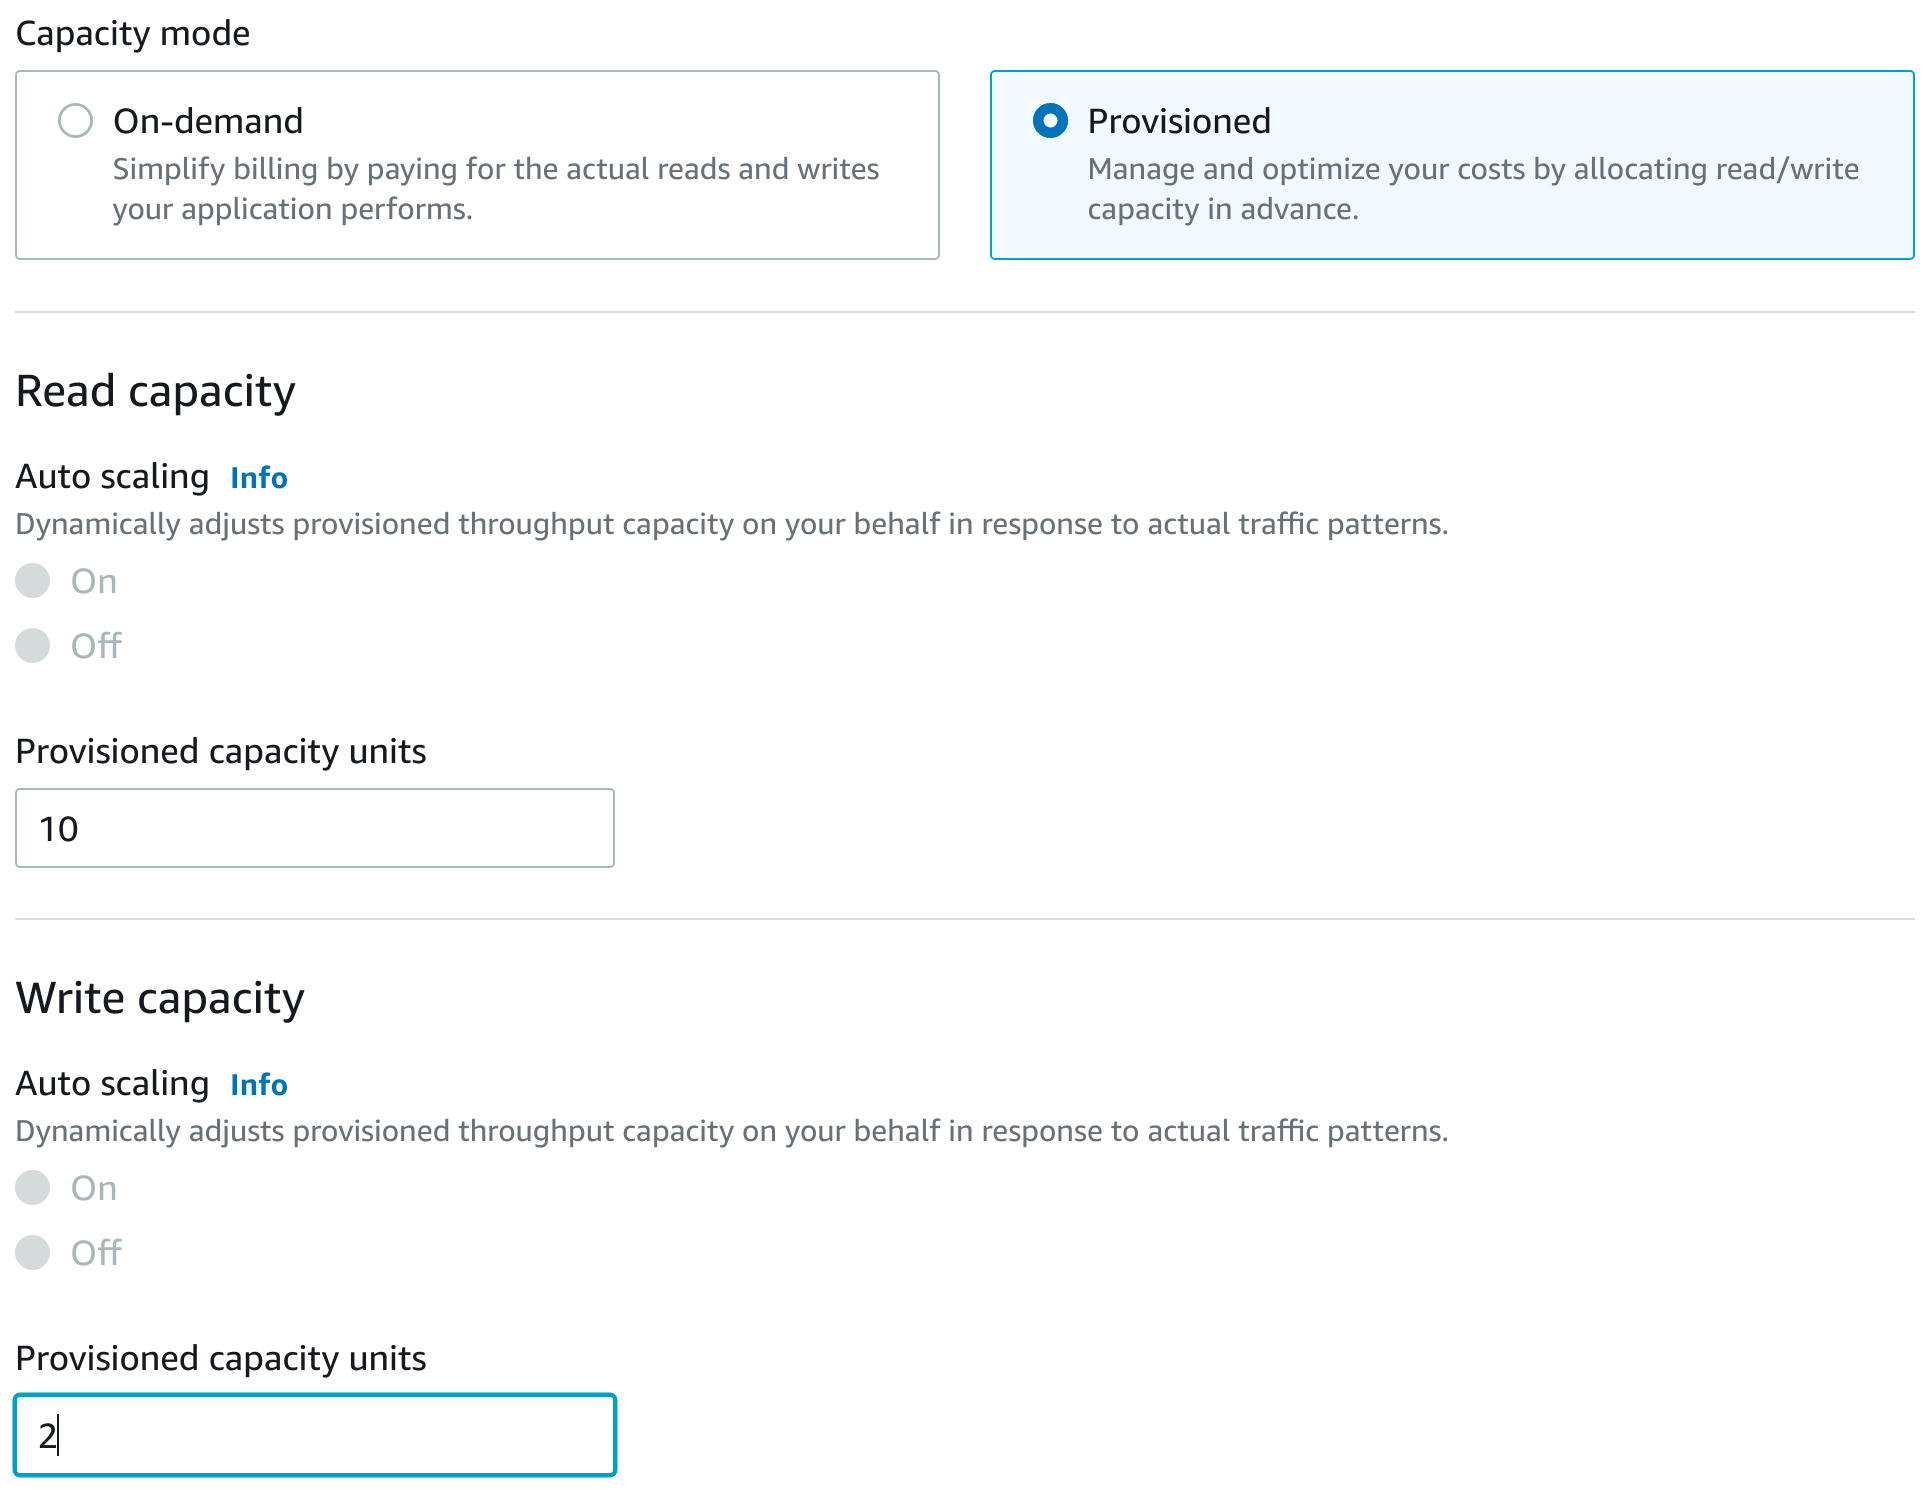
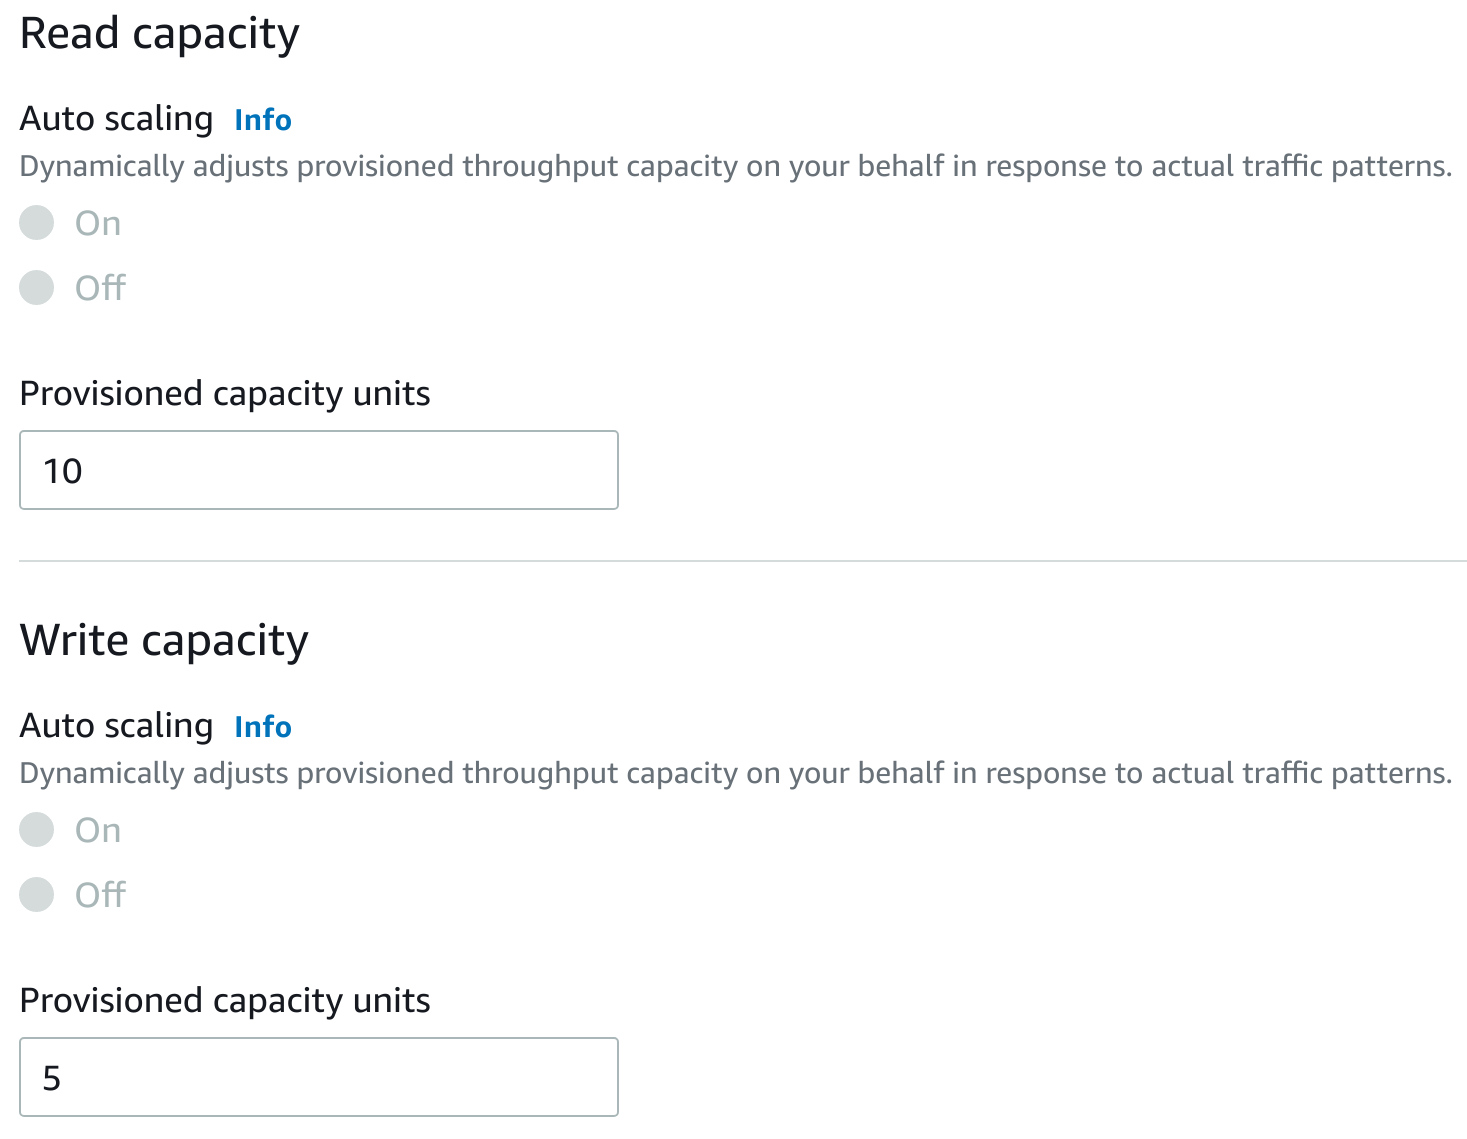
5. In the Read/write capacity settings section, under Capacity mode, select Provisioned and enter the following:
- Read Capacity:
- Provisioned capacity units:
- Write Capacity:
- Provisioned capacity units:
Accept the defaults for all other options on this page.
6. Scroll to the bottom and click Create table:

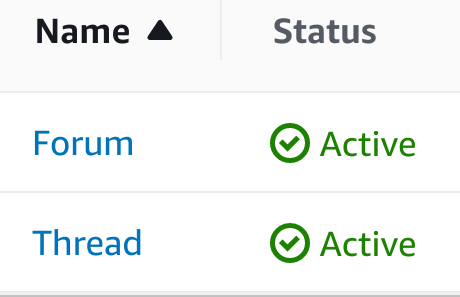
The Tables list view will load and you will see a notification that your table is being created. After a 30 seconds or so, you will see a success notification:

Creating a DynamoDB Table with Local and Global Secondary Indexes
1. On the right-hand side of the page, click Create table:

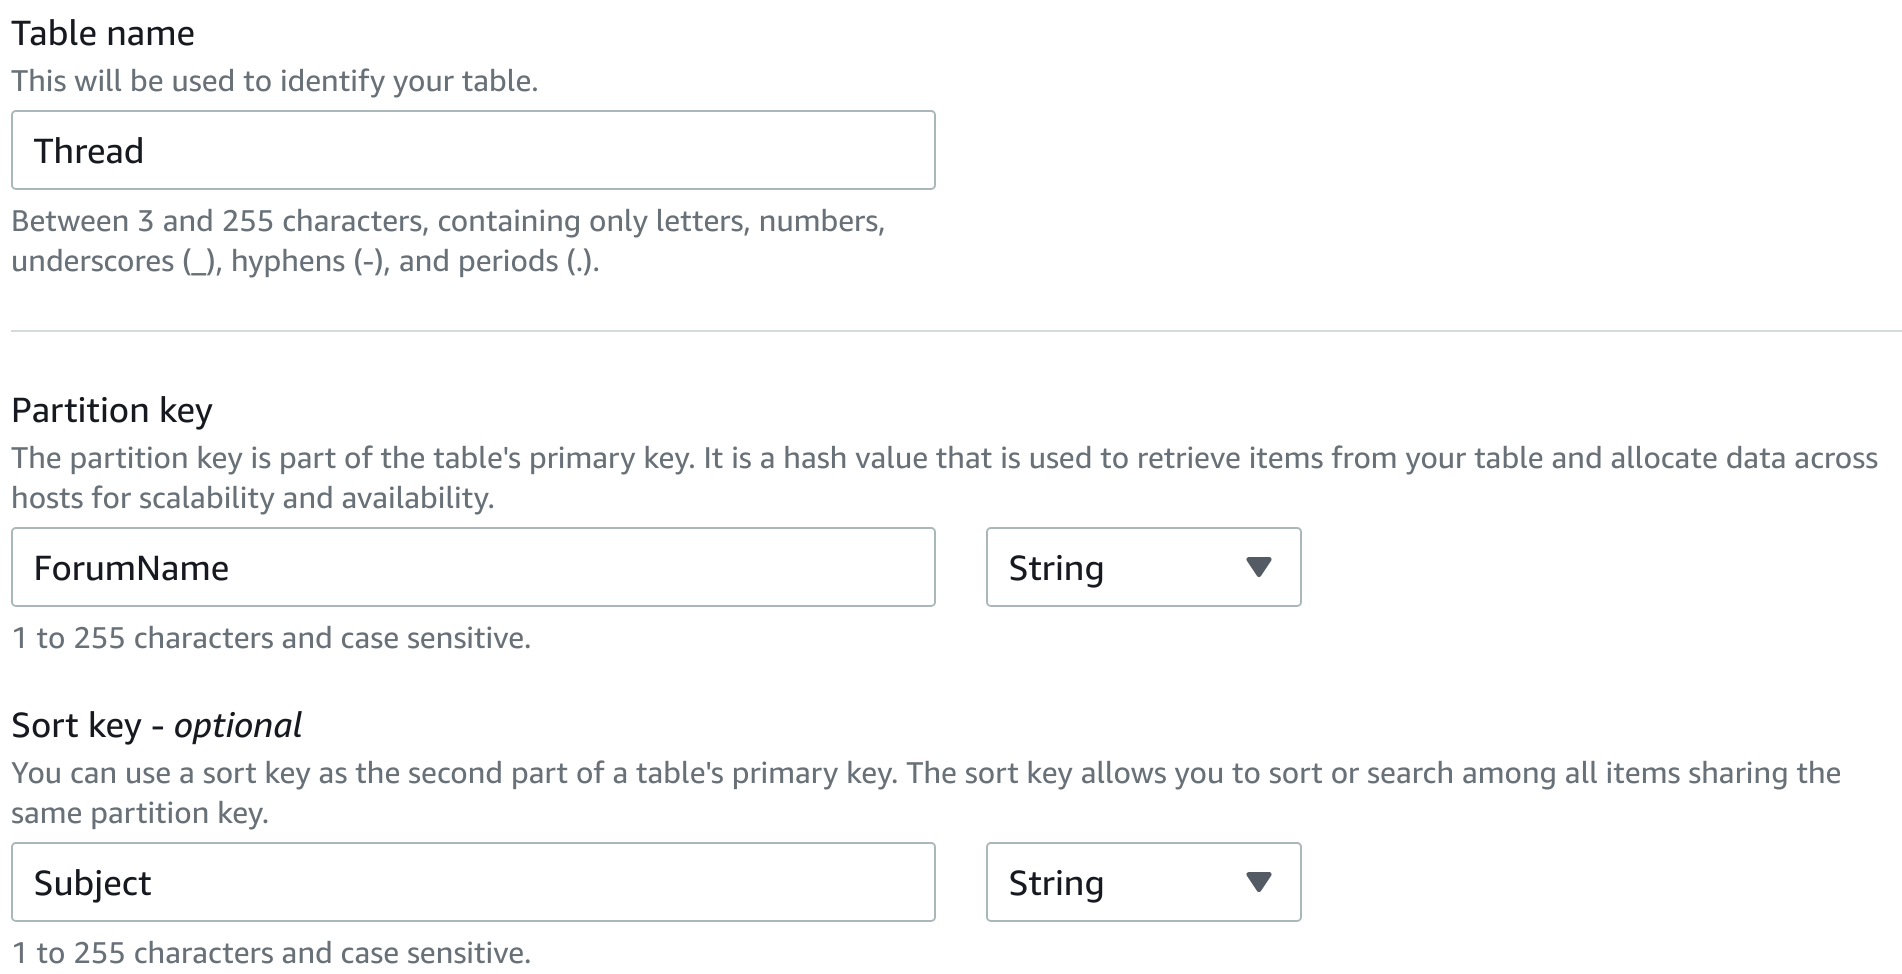
2. Enter the following in the Table details section:
- Table name:
- Partition key:
- Name: Enter
- Type: Select
- Sort key:
- Name: Enter
- Type: Select
3. In the Settings section, select Customize settings.
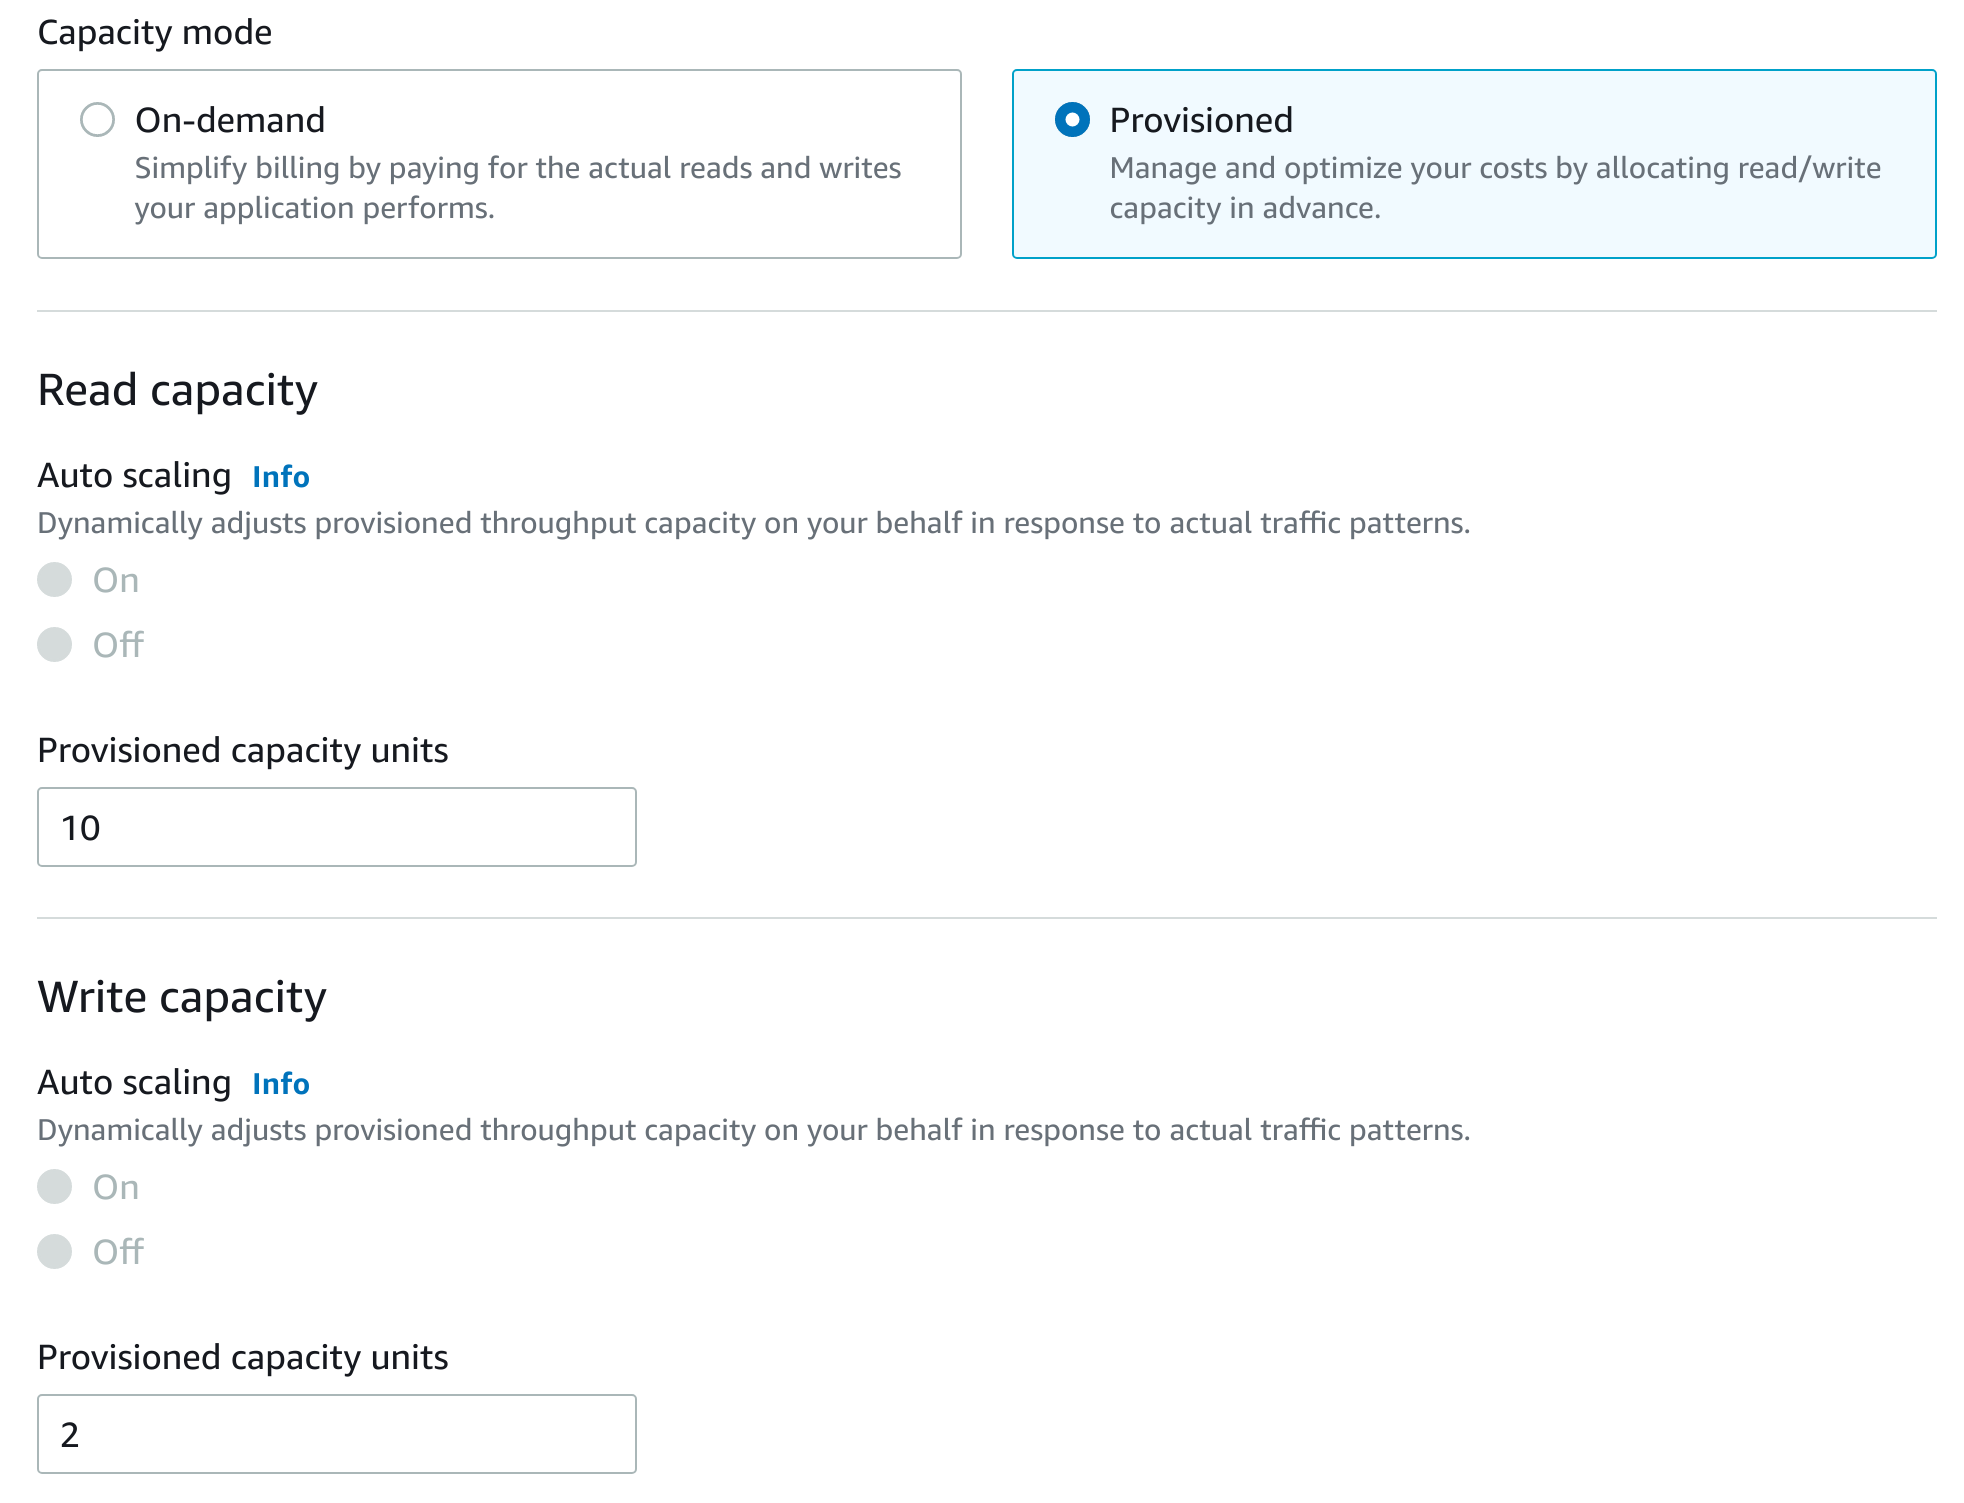
4. Under Read/write capacity settings, ensure Provisioned is selected for Capacity mode, and enter the following:
- Read capacity:
- Provisioned capacity units:
- Write capacity:
- Provisioned capacity units:
5. Scroll down to the Secondary indexes section and click Create local index:
The New local secondary index dialog box will appear.
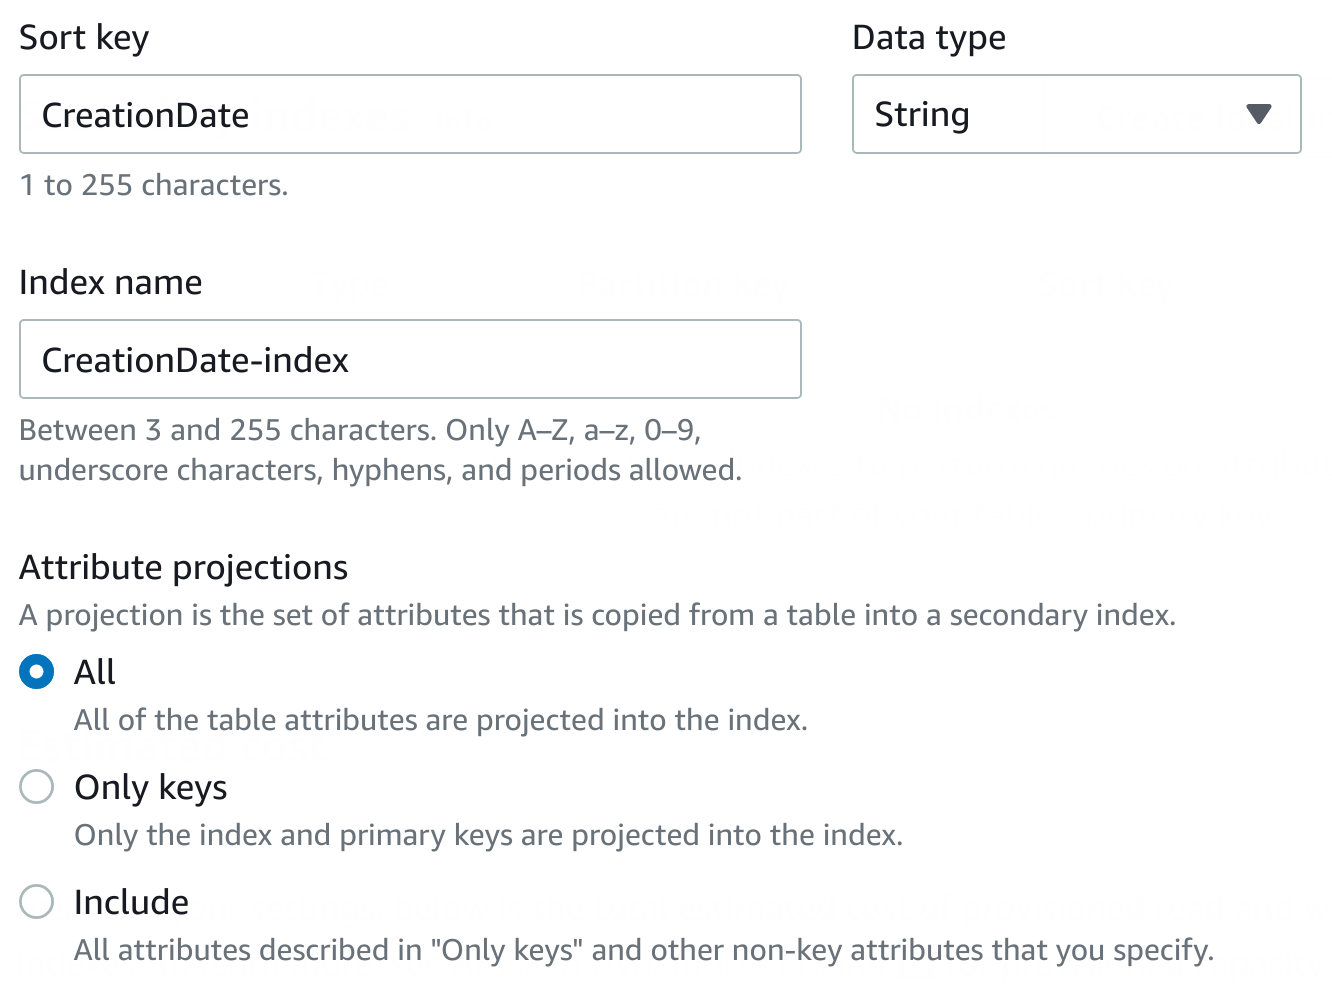
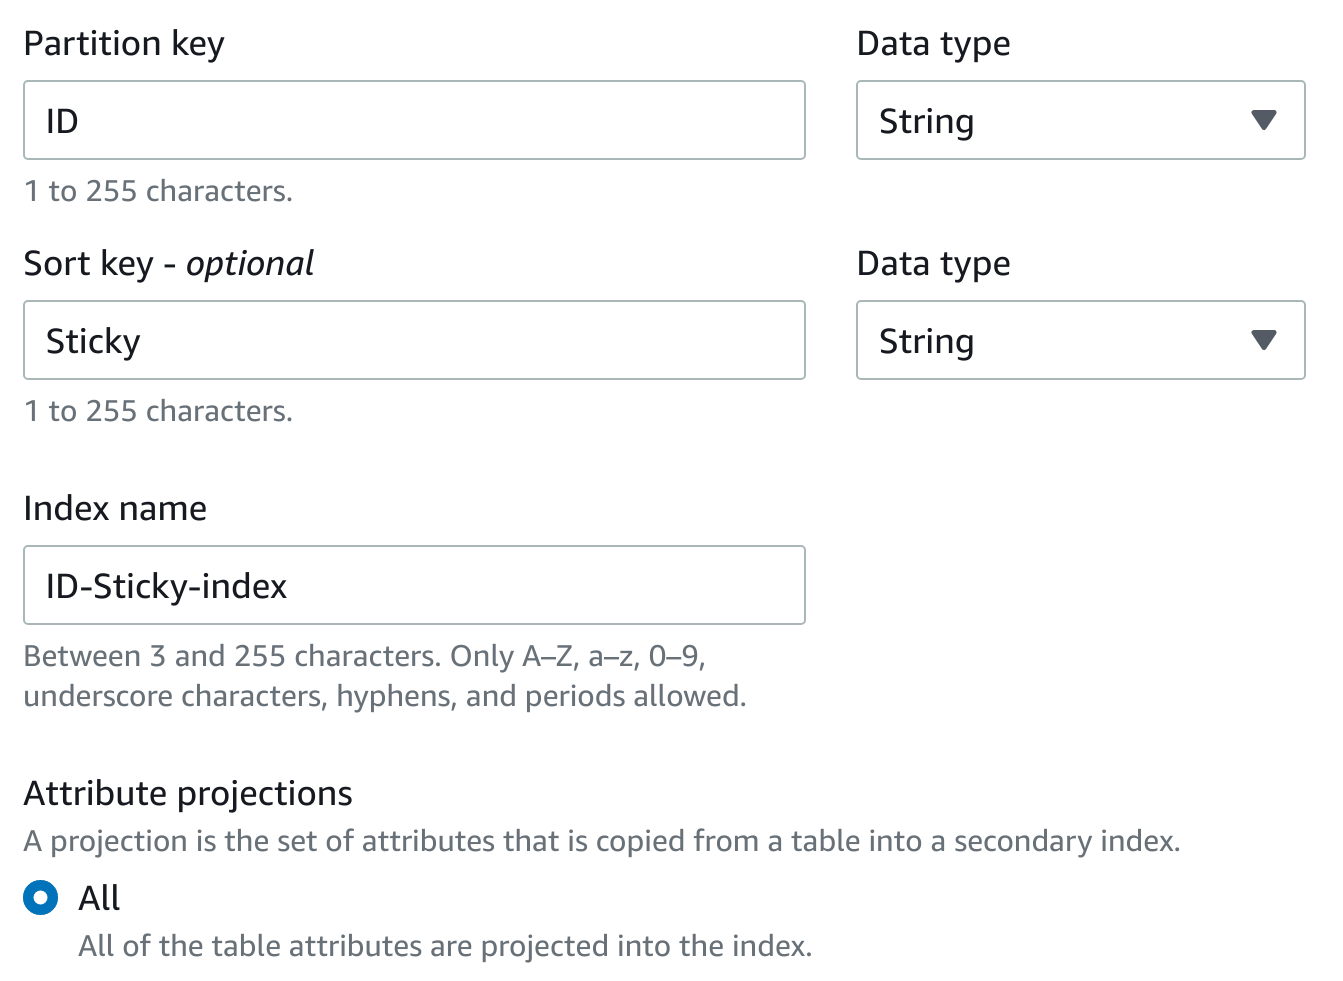
6. Enter the following to configure your local secondary index:
- Sort Key:
- Name: Enter
- Type: Select
- Attribute projections: Select
An LSI (Local Secondary Index) has the same partition key as the table’s primary key and will share the provisioned capacity of the table in contrast to global secondary indexes which provision their own capacity.
7. To finish creating the local secondary index, at the bottom, click Create index:

8. Scroll to the bottom and click Create table.
After roughly 30 seconds you will the table become active:
In contrast to a Local Secondary Index, a Global Secondary Index is an index with a partition and sort key that can be different from those in the table. It is considered “global” because queries on the index can span all of the data in a table, across all partitions.
9. Click Create table once more to start creating another table.
10. Enter the following in the Table details section:
- Table Name:
- Partition key:
- Name: Enter
- Type_:_Select
- Sort key:
- Name: Enter
- Type: Select

11. In the Settings section, select Customize settings.
12. In the Read/write capacity settings section, ensure the Capacity mode is Provisioned, and enter the following:
- Read capacity:
- Provisioned capacity units: Enter
- Write capacity:
- Provisioned capacity units: Enter
13. Scroll down to the Secondary indexes section, and click Create global index:

The New global secondary index dialog form will appear.
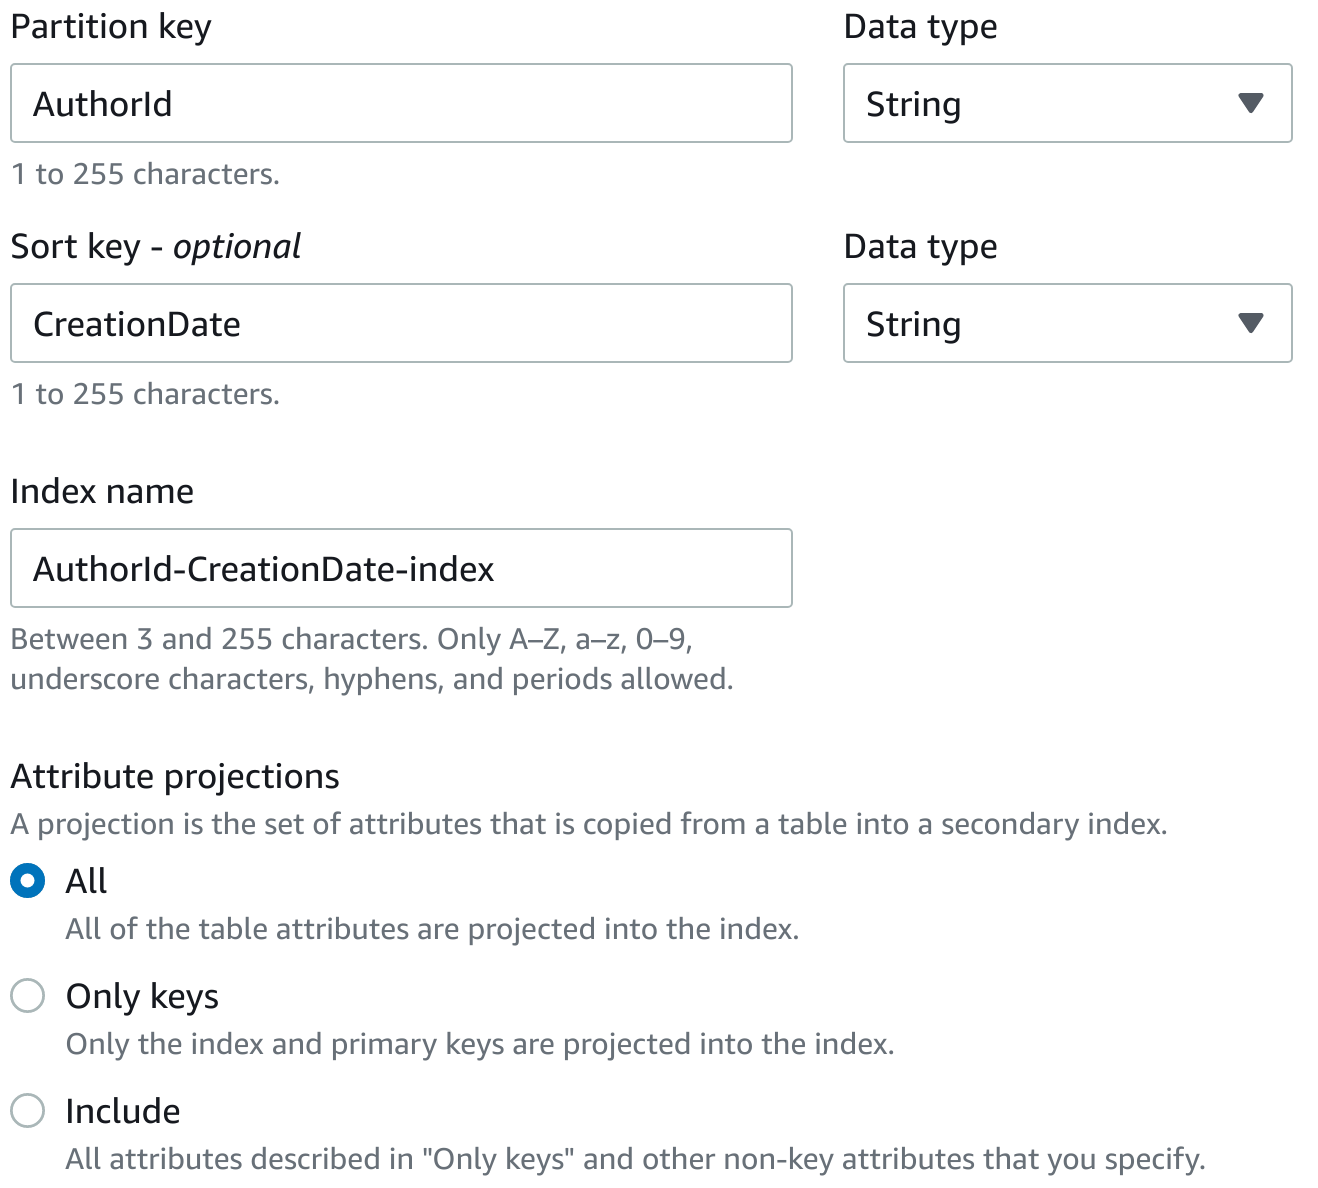
14. Enter the following:
- Partition key:
- Name: Enter
- Type: Select
- Sort key:
- Name: Enter
- Type: Select
- Attribute projections: Select
15. To finish creating the global secondary index, at the bottom, click Create index.
16. Click Create global index again and enter the following:
- Partition key:
- Name: Enter
- Type: Select
- Sort key:
- Name: Enter
- Type: Select
- Attribute projections: Select
17. To finish creating the global secondary index, at the bottom, click Create index.
18. Scroll to the bottom and click Create table.
Once again, you will see your table created after roughly 30 seconds.
Inserting Items Into a DynamoDB Table
1. In the left-hand menu, click Explore items:

2. In the Tables list, select
You will see nothing under Items returned because there are no items stored.
3. On the right-hand side, click Create item:

The Create item form will load and you will see a list of Attributes.
4. In the Value textbox next to Name - Partition key, enter a name for your forum (can be anything you wish):

5. To add another attribute for this item, click Add new attribute and select String from the list of types:

6. In the Attribute name textbox, enter Description and in the Value textbox, enter any value you’d like:

7. At the bottom, click Create item:

8. Repeat steps 3-7 three more times so that end up with four entries in the table:

9. Select the table and click Create Item.
10. Provide any values you’d like for , and , keeping in mind that the value must match the name of one of your forums.
Note: is a " " table with the Local Secondary Index. For being able to save a item, you have to provide:
- (the table Primary Key)
- (the table Sort Key)
- (the Local Secondary Index Sort Key)
Note: You will have to click Add new attribute to add the CreationDate attribute and specify a value.
11. At the bottom, click Create item.
12. Repeat steps 9-11 three more times until you have four items in the table:

Editing DynamoDB Table Items
1. On the Explore items page, select the table:

2. Select any item in the table and click on its name to get to the Item editor page:

3. Click inside any value and make an update to its contents:

Warning: Note that modifying the partition key will result in changing the values of the item keys. This will delete and recreate the item with new keys.
4. At the bottom of the page, click Save changes:

Querying a DynamoDB Table
1. In the left-hand menu, click PartiQL editor:

The PartiQL editor page will load.
PartiQL is a SQL (Structured Query Language) compatible language for Amazon DynamoDB. As well as querying tables, you can use it to insert new items and update existing ones.
2. Under Tables, click the three dots next to the and click Scan table:

The Query 1 editor will be populated with a PartiQL query that selects all items from the .
3. To execute the PartiQL table, under the editor, click Run:

4. Scroll down to see the results under Items returned:

Notice that you have a choice of viewing the results in tabular form or in JSON (Java Script Object Notation):

5. To query for a specific item, replace the contents of the Query 1 editor with the following, and click Run:
SELECT * FROM "Thread" WHERE "Subject" = 'Intro to cool stuff'
This time, you will only see items returned that satisfy the value of the WHERE condition.
Note: Change the value of the WHERE condition to match an item you created if you don’t see a result.
PartiQL supports most standard features of SQL which means you can query, select, and sort your data in sophisticated ways.
Typically, using the Amazon DynamoDB Console to query items is useful for one-off reports and debugging or troubleshooting. Like most databases, DynamoDB can be accessed programmatically by other systems and software applications through either the AWS SDK (software development kit) or DyanmoDB’s HTTP API (application programming interface).
You can learn more about using PartiQL with Amazon DynamoDB by visiting the Working with PartiQL Query Language section of the Amazon DynamoDB developer guide.
Deleting a DynamoDB Table
1. In the left-hand menu, click Tables:

2. In the Tables table, select the Thread table:

3. On the right-hand side, click Delete:

The Delete table confirmation modal will appear.
Notice that you have the ability to create a backup for a table before deleting it.
4. In the confirmation textbox, enter delete and click Delete table:

You will see a message summarizing the deletion:

5. To continue, click Go to tables:

6. To update the Tables table, click the refresh icon:

You will now see only two tables listed.