TestFlight Troubleshooting Guide
TLDR
When facing TestFlight errors, follow these steps in order:
- Check Agreements Status - Ensure all agreements (especially Paid Apps Agreement) are Active
- Verify Beta Information - Fill in Test Information in TestFlight settings
- Check Build Status - Verify build is processed and available for testing
- Remove and Re-add Build to Groups - Sometimes helps refresh the connection
- Sign Out/In Media & Purchases - Fixes account sync issues on device
- Check Email Invitations - Accept TestFlight invitations via email
- Verify Device Compatibility - Ensure you're testing on the correct device type
- Contact Apple Support - If nothing else works
Common TestFlight Errors
Error 1: BETA_CONTRACT_MISSING
Error Message:
{
  "errors": [
    {
      "id": "e98ea35a-36f8-4c26-8a04-40663800b69c",
      "status": "422",
      "code": "ENTITY_UNPROCESSABLE.BETA_CONTRACT_MISSING",
      "title": "Beta contract is missing for the app.",
      "detail": "Beta Contract is missing."
    }
  ]
}
What This Means: This 422 Unprocessable Entity error indicates that the Account Holder for your Apple Developer Team has not signed a required legal agreement. Apple requires active, signed contracts before you can:
- Distribute builds to TestFlight (beta testing)
- Add new beta testers
- Submit an app for review
Solution:
-
Account Holder Must Sign In
- Only the Account Holder can accept these agreements (not Admin or Developer roles)
- Log in to App Store Connect
-
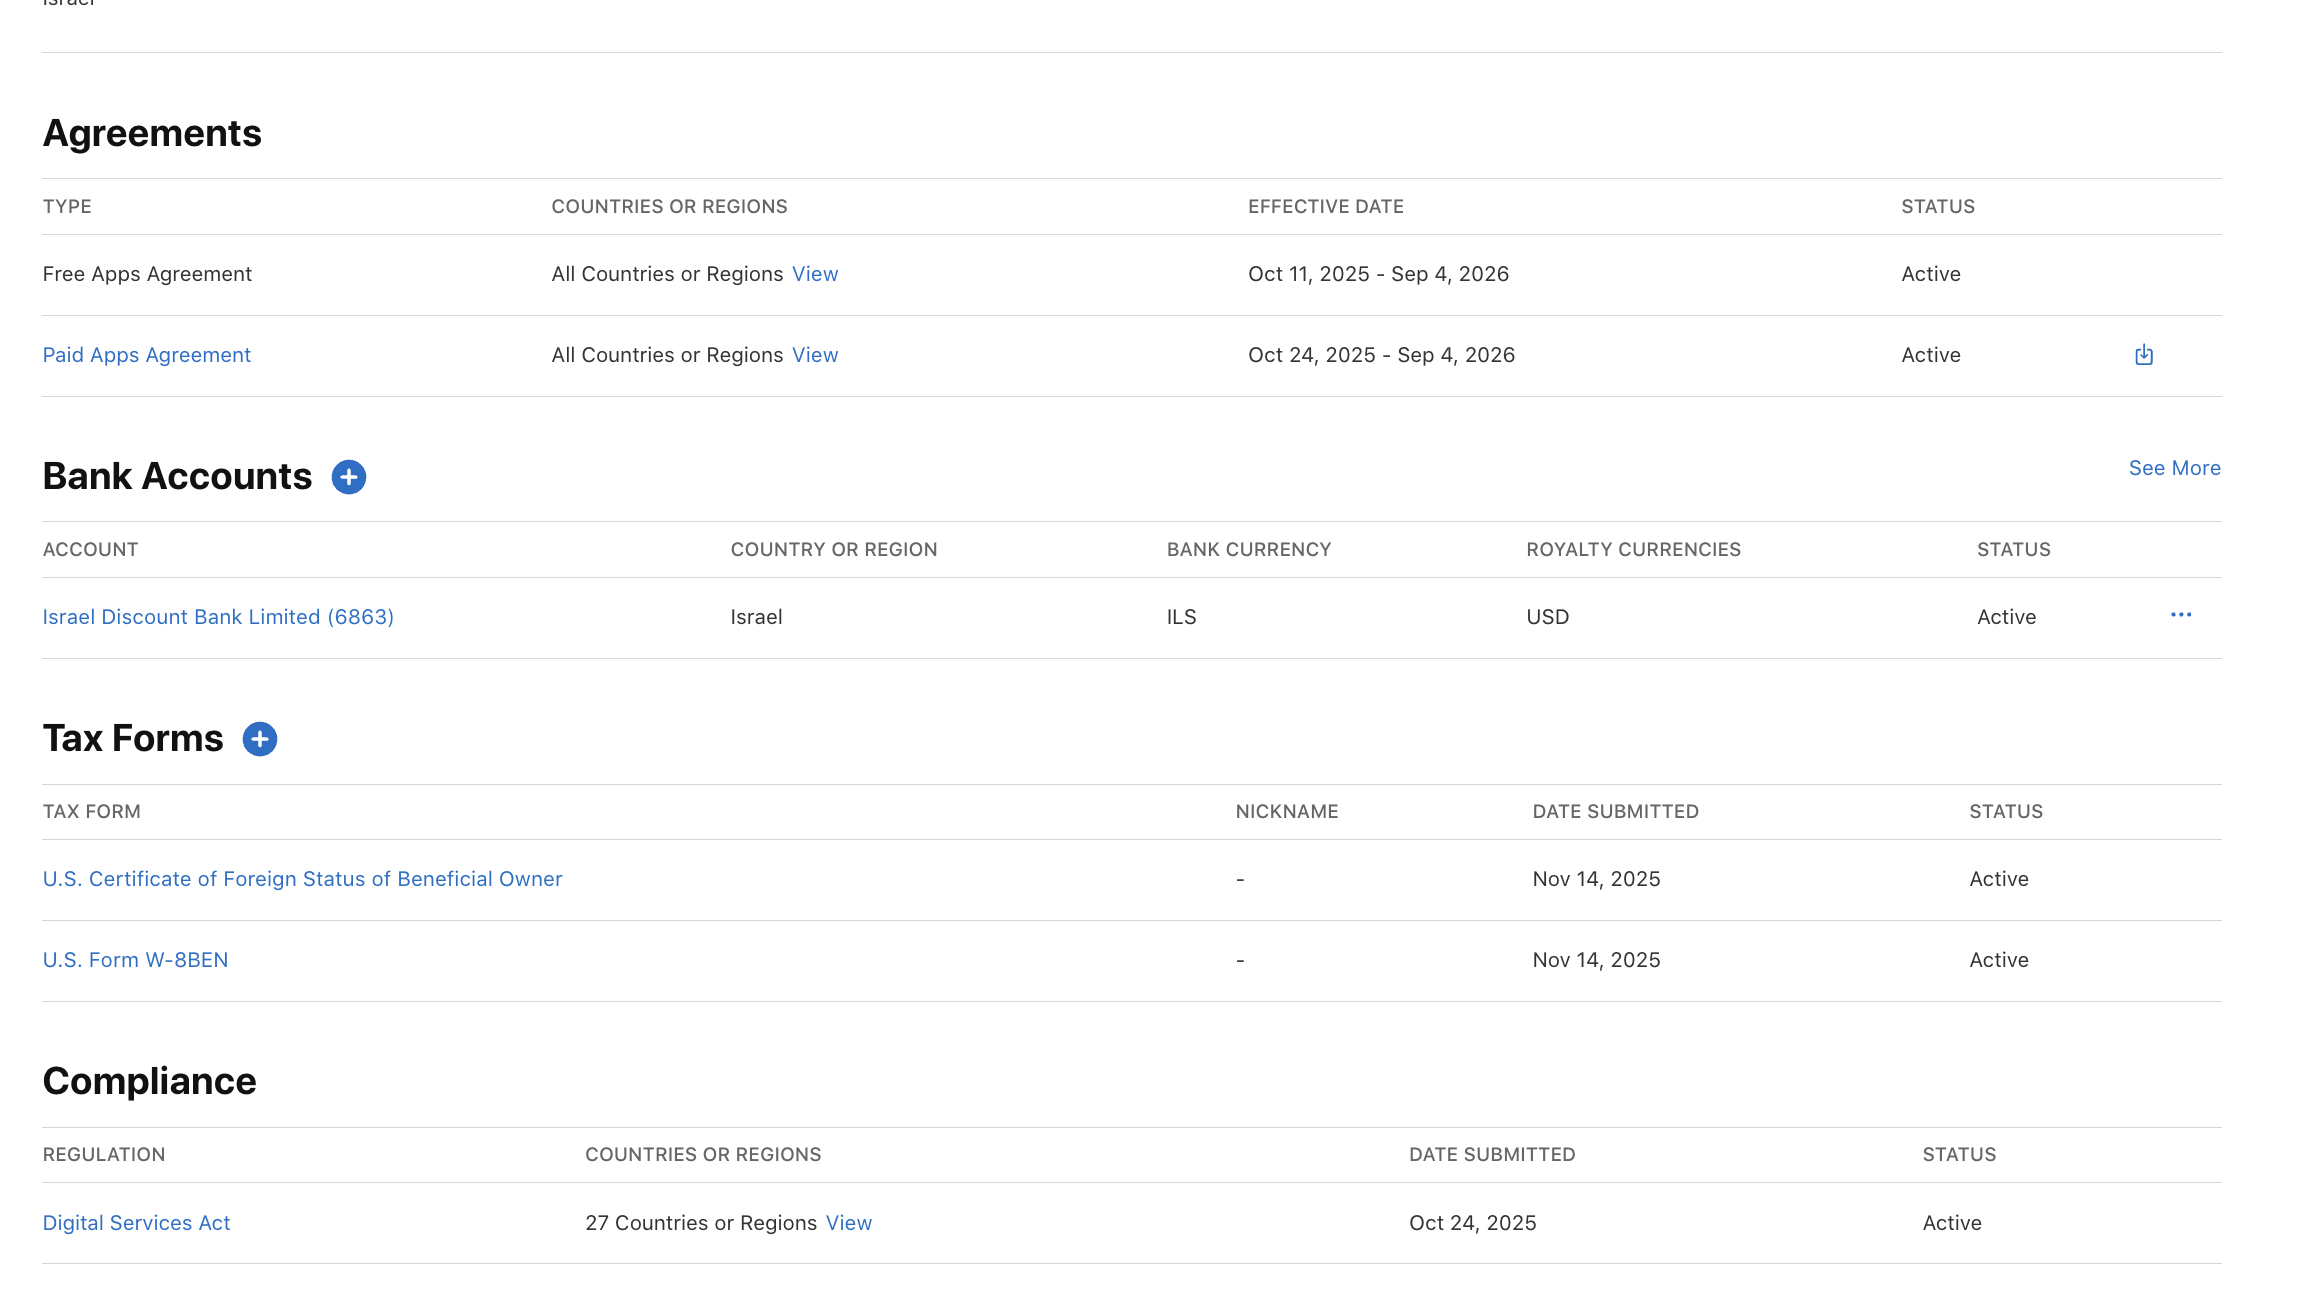
Check Agreements Page
- Navigate to "Agreements, Tax, and Banking" section
- Look for pending agreements under "Agreements in Effect" or "Pending Agreements"
-
Common Issue: Paid Apps Agreement Pending
- Even for free apps, Apple requires the Paid Apps Agreement to be Active for TestFlight
- If status shows "Pending User Info", you need to add banking information
- Click "Add Bank Account" and fill in your banking details
- Once added, the status should change from "Pending User Info" to "Active"
- Wait for Propagation
- After signing agreements, wait a few minutes for changes to take effect
- Try your request again
Note: There is a correlation between TestFlight and bank account requirements. Even for internal testing only, Apple requires the Paid Apps Agreement to be Active, which requires bank account information.
Error 2: Beta App Description Missing
Error Message:
Failure: POST https://api.appstoreconnect.apple.com/v1/betaAppReviewSubmissions
returned 422: Beta App Description is missing.
- Beta App Description is required to submit a build for external testing.
What This Means: When submitting a build for external TestFlight testing, Apple requires you to fill in the Test Information (Beta App Description).
Solution:
- Go to App Store Connect → TestFlight tab
- Select your app
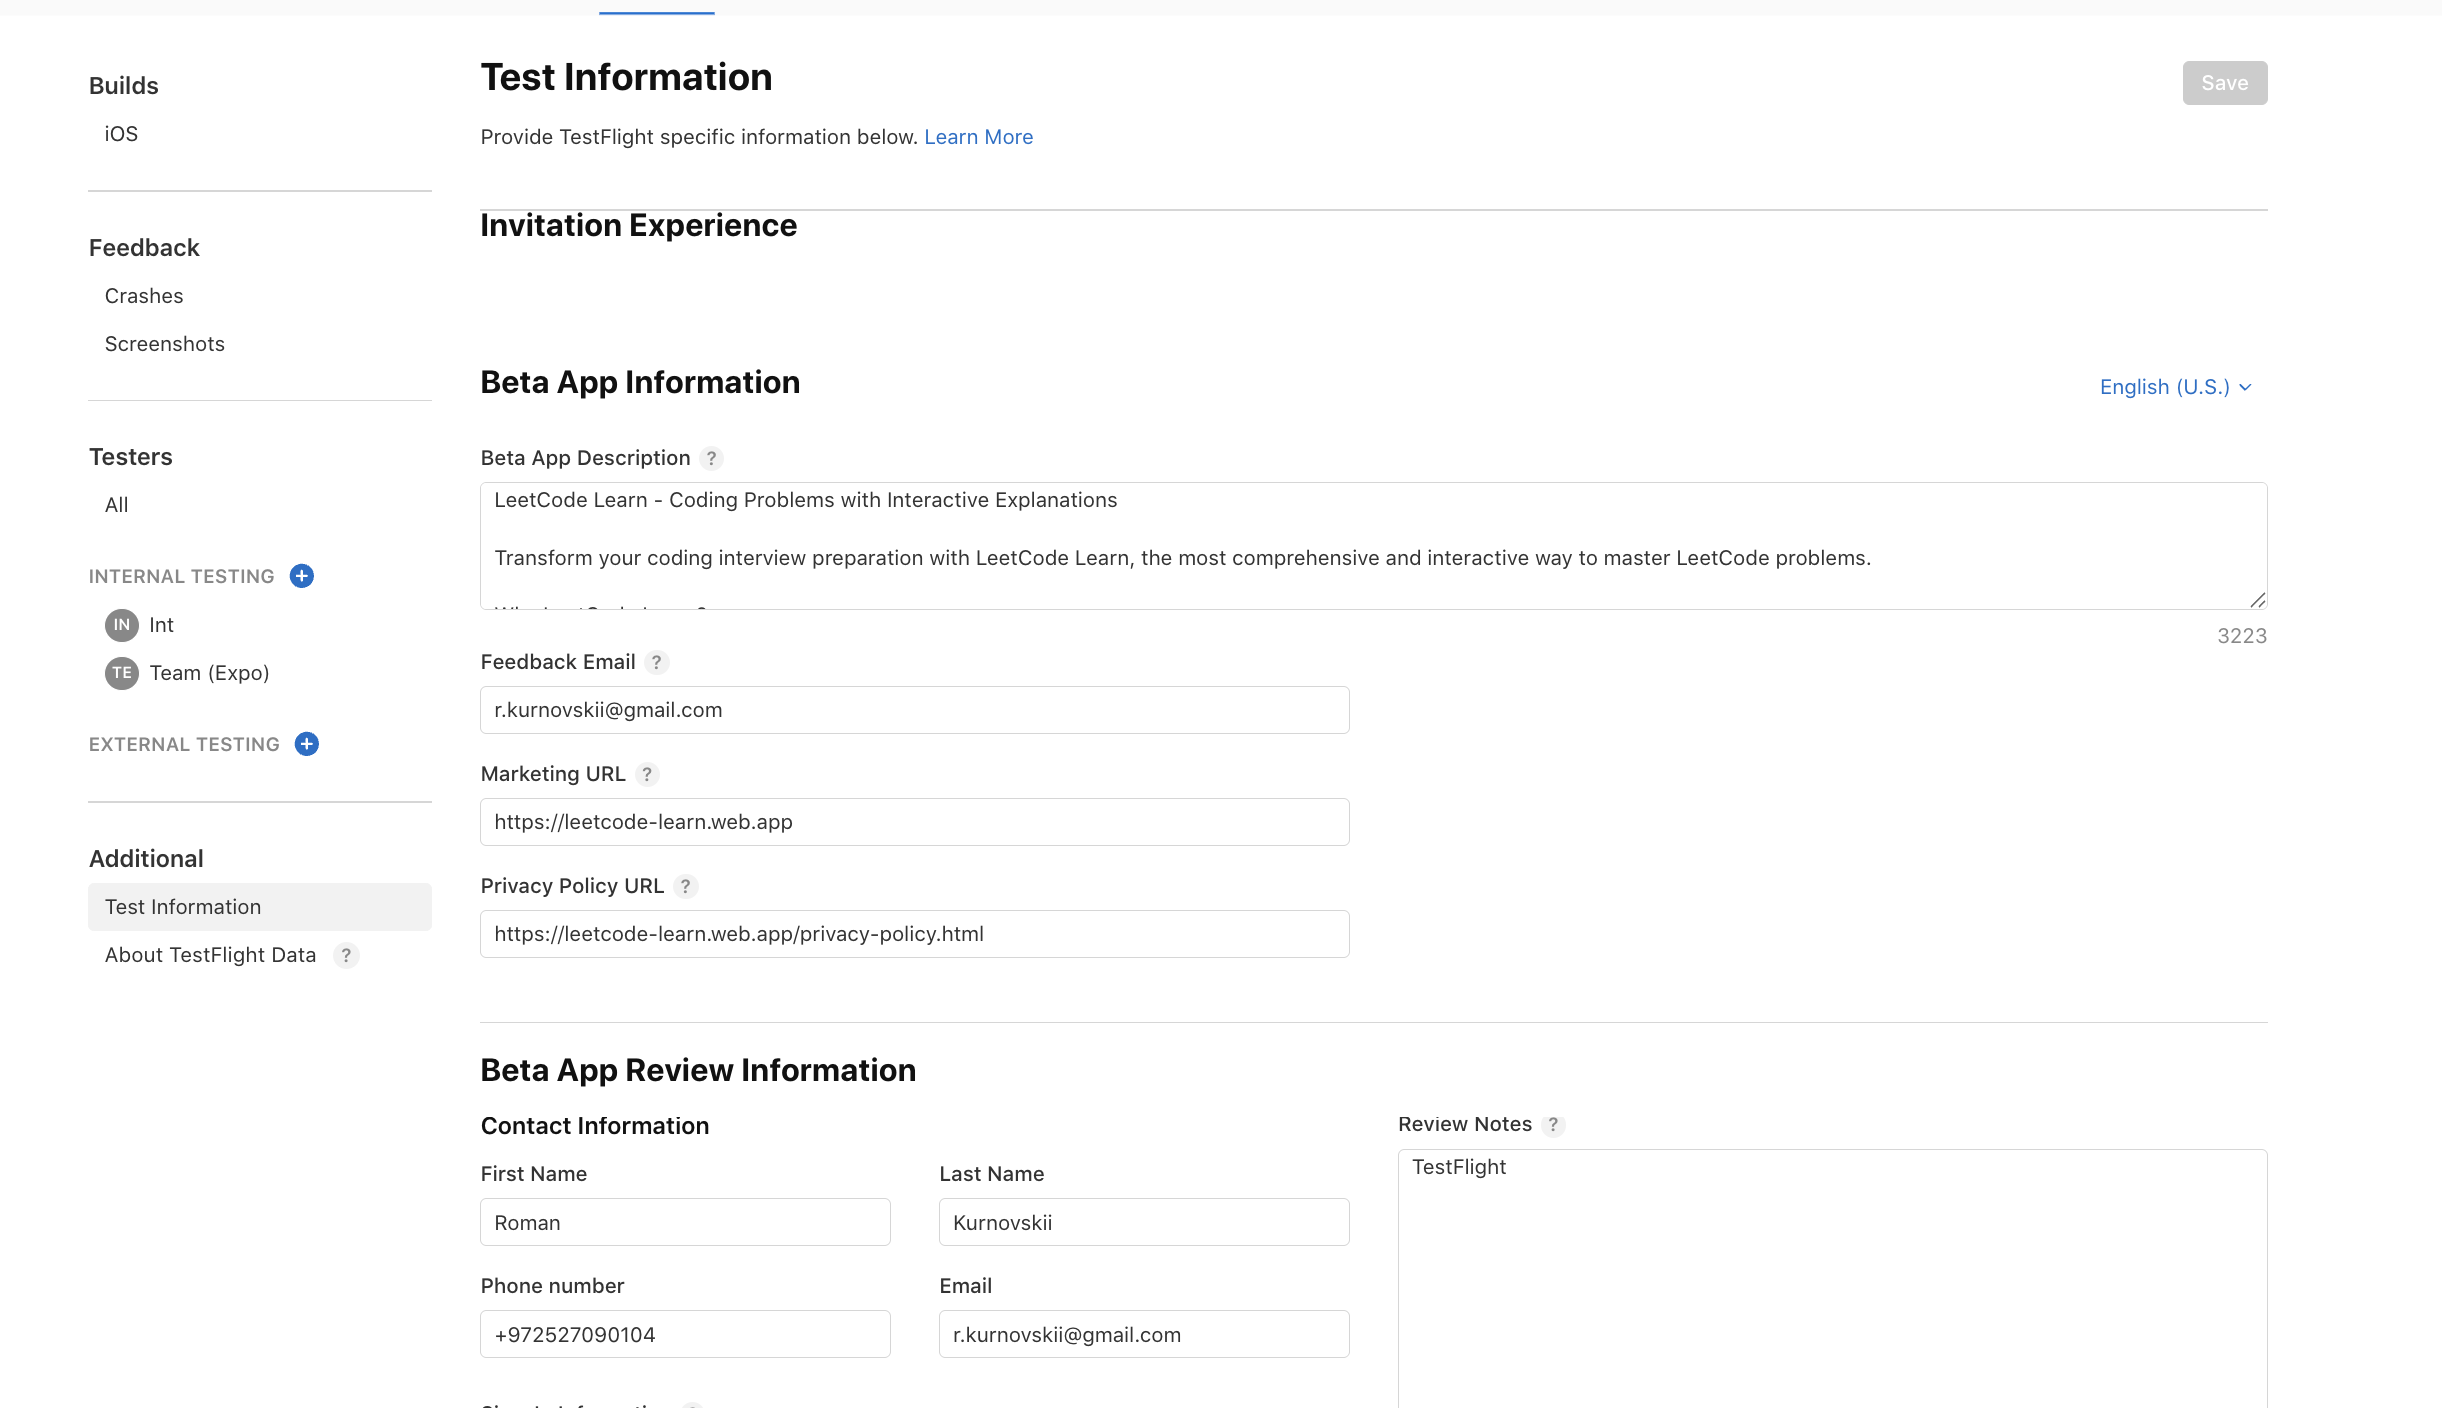
- Navigate to Test Information section
- Fill in all required fields:
- What to Test
- Beta App Description
- Feedback Email (optional but recommended)
- Marketing URL (optional)
- Privacy Policy URL (if required)
- Save the information
- Try submitting your build for external testing again
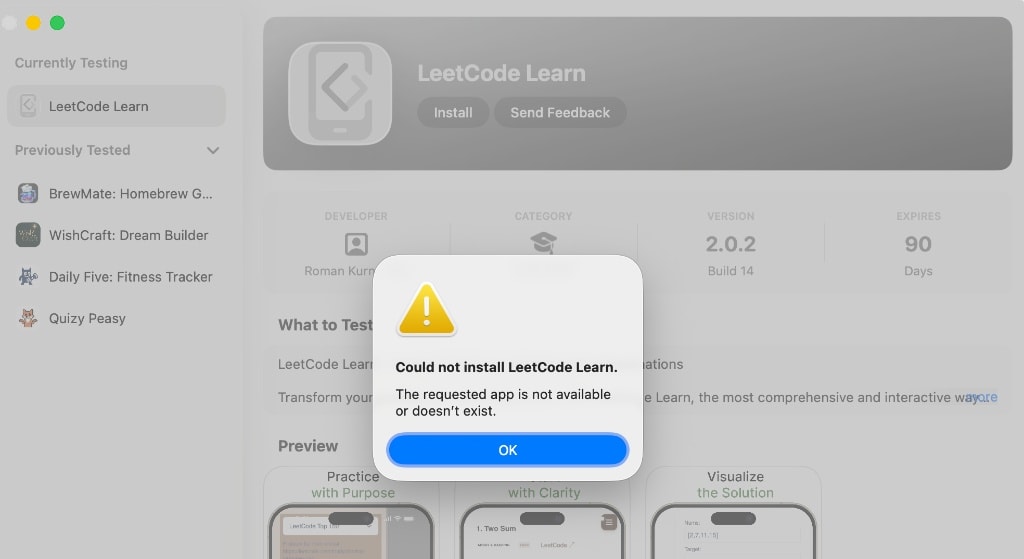
Error 3: "App Not Available" or "Запрошенное приложение недоступно или не существует"
Error Message: The app shows as unavailable or doesn't exist when testers try to install it.
What This Means: This is usually a synchronization issue between App Store Connect and the TestFlight app on the device.
Solutions (Try in Order):
Solution 1: Check Email Invitation
Even if you're the Account Holder, if you added yourself to a test group, you should receive an invitation email:
- Check your email inbox (the one associated with your Apple ID)
- Look for email from TestFlight with subject "You're invited to test [App Name]"
- Click "Accept" or "View in TestFlight" button in the email
- This officially links your Apple ID to the tester slot
Solution 2: Sign Out of Media & Purchases
The Apple ID for App Store can be different from your main iCloud ID. This is the one that matters for TestFlight:
- On your iPhone, go to Settings
- Tap your name at the top
- Tap Media & Purchases
- A pop-up will appear. Tap Sign Out
- Wait a few seconds
- Tap Media & Purchases again and sign back in with your Apple ID
- Open the TestFlight app - it should refresh and show the app
Solution 3: Remove and Re-add Build to Groups
Force App Store Connect to resend the availability data:
- Go to TestFlight tab in App Store Connect
- Select your build (e.g., version 2.0.2, build 14)
- Under Groups, click the red minus icon (-) to remove the build from the current group
- Wait 5-10 minutes
- Click the blue plus icon (+) to add the build back to your test group
- Completely quit the TestFlight app on your iPhone (swipe it up from the app switcher)
- Re-open the TestFlight app
Solution 4: Verify Device Compatibility
If you're trying to install an iPhone app on a Mac:
- The TestFlight app on Mac can see all builds but can only install macOS or iPad apps (on Apple Silicon Macs)
- iPhone-only apps must be installed from the TestFlight app on an iPhone
Check your build information - if deviceFamilies: ["IPHONE"], you must use an iPhone.
Error 4: Build Status Issues
Understanding Build States:
When checking your build status, you might see:
{
  "processingState": "VALID",
  "internalBuildState": "IN_BETA_TESTING",
  "externalBuildState": "READY_FOR_BETA_SUBMISSION"
}
What This Means:
processingState: "VALID"- Your build is fineinternalBuildState: "IN_BETA_TESTING"- Available for internal teamexternalBuildState: "READY_FOR_BETA_SUBMISSION"- Ready for external testing (but requires submission)
For Internal Testing:
If internalBuildState is "IN_BETA_TESTING", you don't need to submit for review:
- Go to TestFlight tab in App Store Connect
- Select your app
- Click on your internal test group (often called "Internal Group" or "App Store Connect Users")
- Click the "+" button to add your build to that group
- Internal testers should then receive notifications
For External Testing: If you want external testing, you need to:
- Ensure Beta App Description is filled (see Error 2)
- Ensure all agreements are Active (see Error 1)
- Submit the build for external beta review
General Troubleshooting Steps
When facing any TestFlight issue, follow these steps systematically:
Step 1: Check Inspector for API Errors
If you get an unclear error when trying to publish to TestFlight:
- Open browser Developer Tools (Inspector)
- Go to Network tab
- Try the action that's failing
- Look for failed requests with error responses
- Check the response body for detailed error messages
This will give you the exact error code and message from Apple's API.
Step 2: Verify Agreements Status
- Log in to App Store Connect
- Go to Agreements, Tax, and Banking
- Verify all agreements show "Active" status
- If any show "Pending User Info", complete the required information (usually bank account)
- Wait a few minutes for changes to propagate
Step 3: Verify Beta Information
- Go to TestFlight → Your App
- Check Test Information section
- Ensure all required fields are filled:
- What to Test
- Beta App Description
- Save if you made changes
Step 4: Check Build Processing Status
- Go to TestFlight → Your App → Builds
- Verify your build shows:
- Processing complete
- Status: Ready for testing (or similar)
- If build is still processing, wait for it to complete
Step 5: Remove and Re-add Build to Groups
Sometimes the connection between builds and test groups gets out of sync:
- Remove the build from all test groups
- Wait 5-10 minutes
- Add the build back to the appropriate test groups
- Wait another 5-10 minutes
- Ask testers to completely quit and restart the TestFlight app
Step 6: Verify Device and Account
-
On iPhone:
- Sign out of Media & Purchases in Settings
- Sign back in with the correct Apple ID
- Open TestFlight app
-
Check Email:
- Look for TestFlight invitation emails
- Accept any pending invitations
-
Verify Device Type:
- Ensure you're testing on the correct device (iPhone vs iPad vs Mac)
- Check build's
deviceFamiliesto confirm compatibility
Step 7: Contact Apple Support
If none of the above steps work:
- Go to App Store Connect Support
- Select "App Store Connect" as the topic
- Provide:
- Your app name and bundle ID
- Build number and version
- Exact error messages
- Steps you've already tried
- Screenshots of errors
Quick Reference Checklist
Before submitting to TestFlight, ensure:
- All agreements are Active (especially Paid Apps Agreement)
- Bank account information is added (if required)
- Beta App Description is filled in Test Information
- Build has finished processing
- Build is added to appropriate test groups
- Testers have accepted email invitations
- Testers are using correct device type
- Testers have signed in with correct Apple ID in Media & Purchases
Summary
Most TestFlight issues stem from:
- Missing Agreements - Account Holder must sign all required agreements, including adding bank account info
- Missing Beta Information - Required for external testing
- Account Sync Issues - Sign out/in of Media & Purchases on device
- Build Group Sync - Remove and re-add builds to groups
- Device Compatibility - Ensure correct device type for the app
Following these troubleshooting steps in order should resolve most TestFlight issues. If problems persist, contact Apple Support with detailed information about the errors and steps you've already tried.
Be the first to comment.